
New Release
The Portrait Retouching Masterclass
$97$47
Ever been captivated by a perfect portrait and wondered how to recreate the magic? It's time to unlock the secrets of professional retouching. Learn to transform your photographs into stunning, gallery-worthy masterpieces, all on your own.
GET STARTEDToday's Special Deal Offer!
Act now! This special offer is ending soon...
"As a beginner, I was always overwhelmed by the thought of retouching my photos. I would get lost in the myriad of tools and not know where to start. The Portrait Retouching Masterclass completely demystified the process for me. I loved the detailed step-by-step tutorials and the fact that I could create stunning results on my own! I can't recommend it enough."
- Samantha H., Aspiring Portrait Photographer
"Having worked with retouchers in the past, I was often left disappointed with the results. But with The Portrait Retouching Masterclass, I've not only saved money but also learned how to bring my vision to life in a much more satisfying way. I now feel more in control of my work and my clients couldn't be happier!"
- James P., Professional Photographer
"I've always loved photography, but retouching was my Achilles' heel. The Portrait Retouching Masterclass has transformed how I approach retouching. The techniques taught are subtle yet impactful, and the results are mind-blowing. My friends and family are amazed at the transformation in my photos. This course is a game-changer!"
- Emily W., Hobbyist Photographer
Learn all the techniques you need to create gallery-worthy images!


What You’ll Learn
In this comprehensive Color Portrait Retouching masterclass, you’ll uncover the art and science of retouching.
Introduction
Welcome to this course! In this lesson, you get a brief overview of the course and what you will be learning in order to bring out the best in a Portrait. You will learn what is possible, how the c...
Your Workspace
Here you learn how to set up your Photoshop workspace so that it matches the one used in the lessons and so you can work as efficiently as possible when following along.
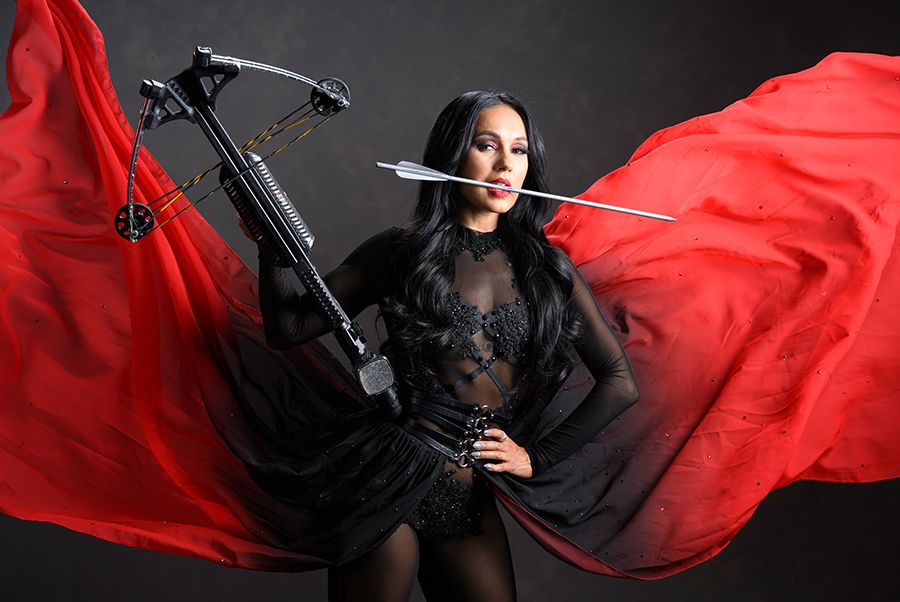
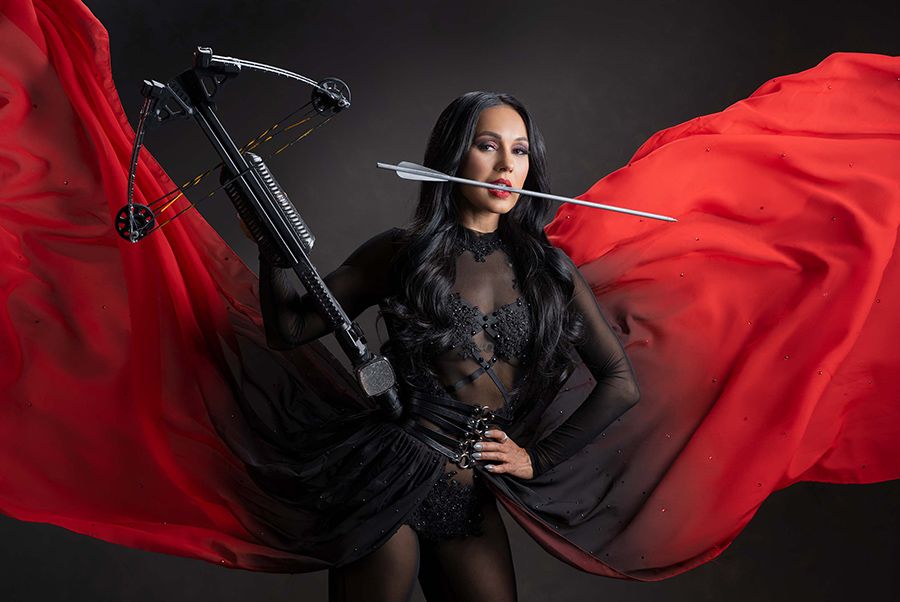
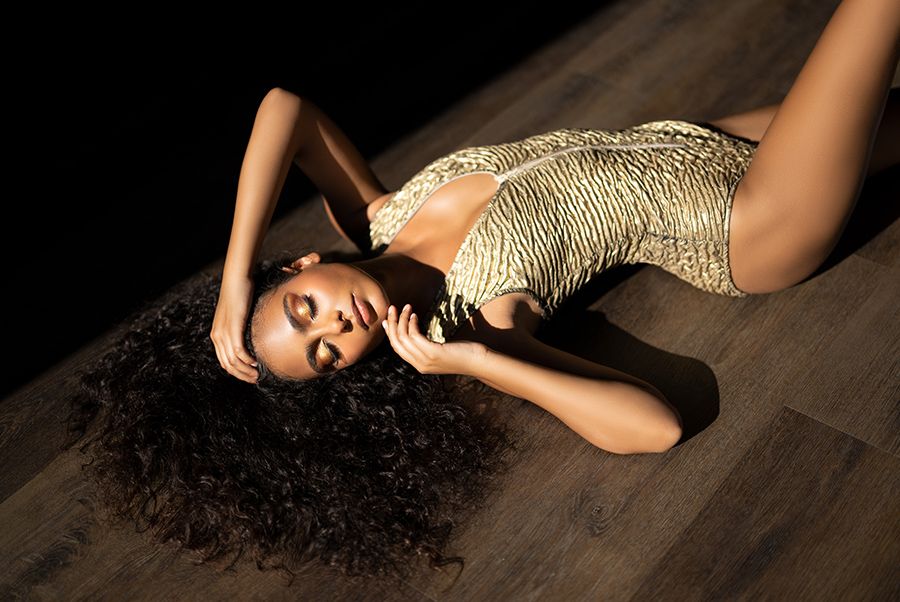
Anna The Archer
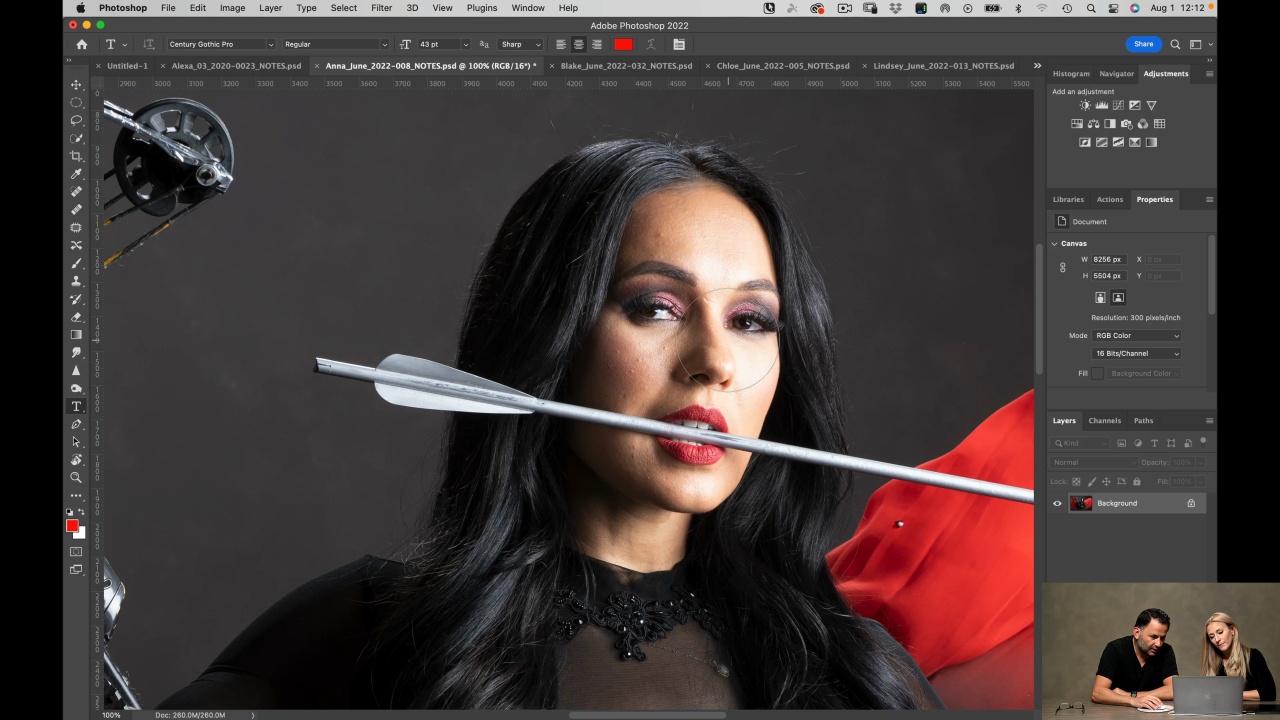
Introduction
In this lesson, you learn what needs to be done to retouch this Portrait of Anna Dangerous - an amazing performer in Las Vegas who originally started out in America’s Got Talent.
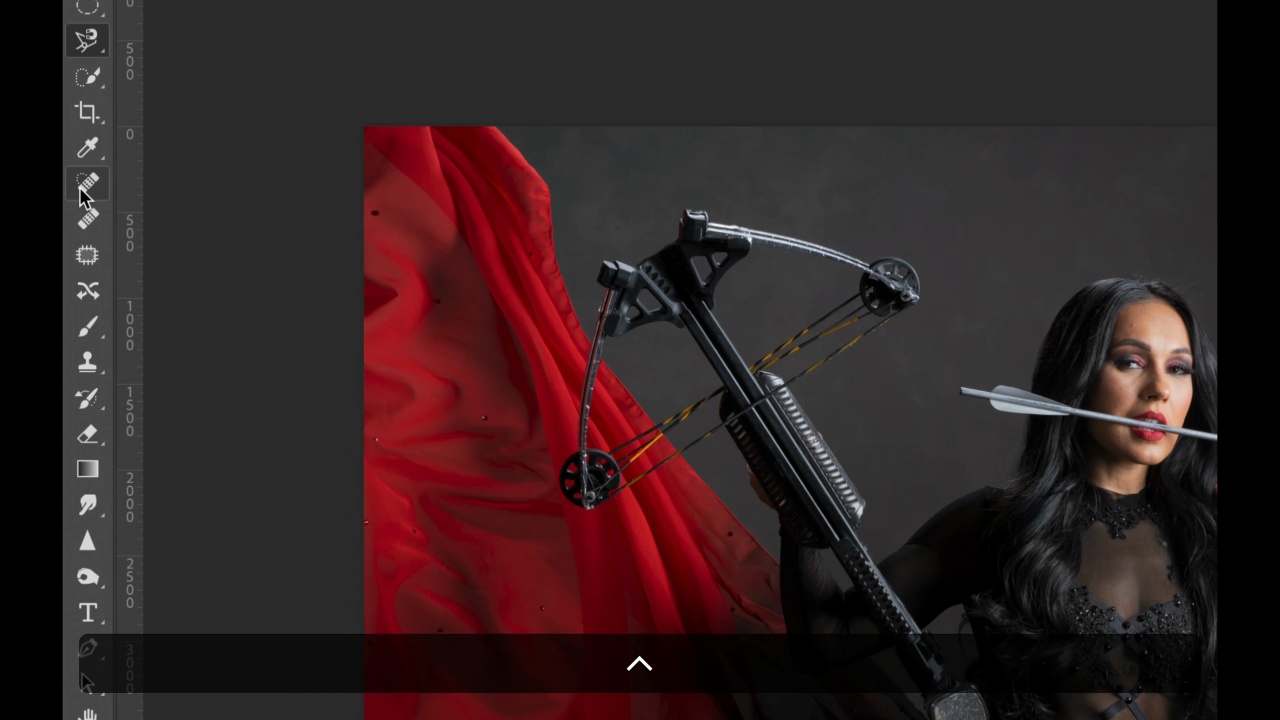
Basic Corrections
In this lesson, you learn how to do all the basic corrections to the Portrait, including spots and dots removal on the skin, hair frizz removal, and you even learn how to transform and extend the f...

Frequency Separation
In this lesson, you learn two methods to remove wrinkles from fabric and how to enhance skin tone. Perfect for giving Anna this beautiful flowing dress and flawless skin.
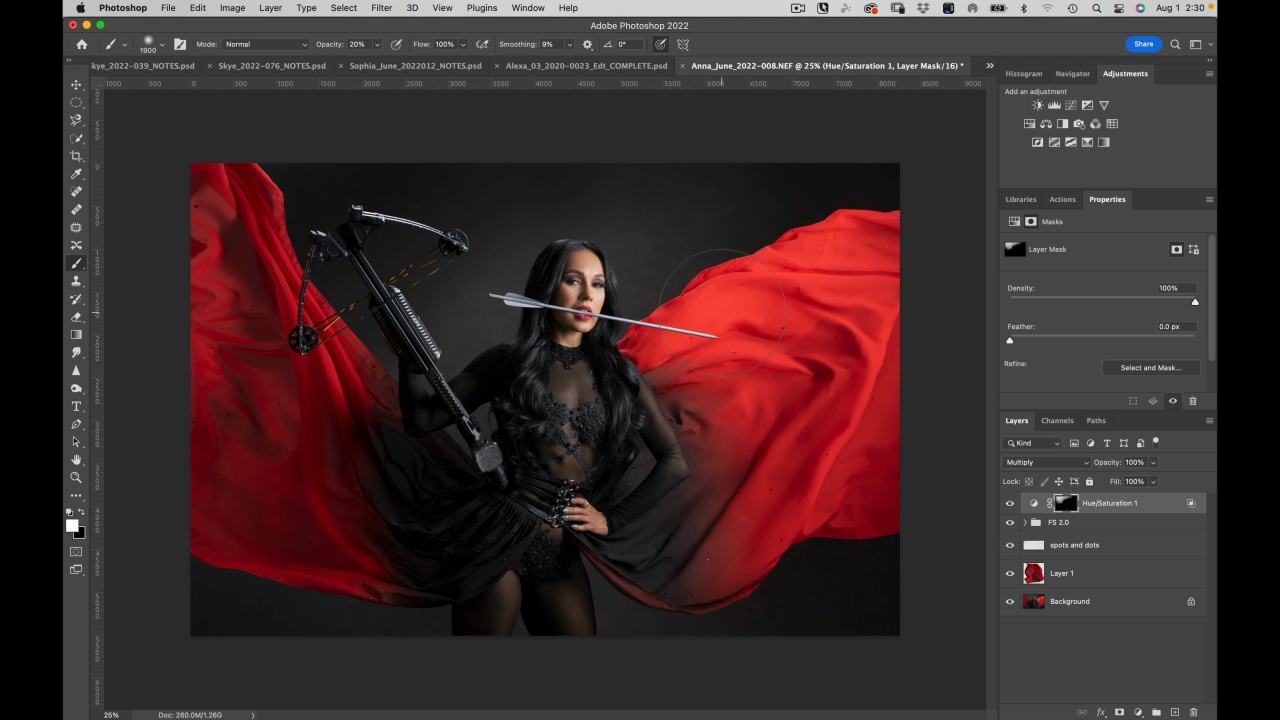
Eyes and Background
In this lesson, you learn how to adjust the eyes and how to even them out, as well as how to add a slightly soft vignette to the background without affecting the bow or the red dress.
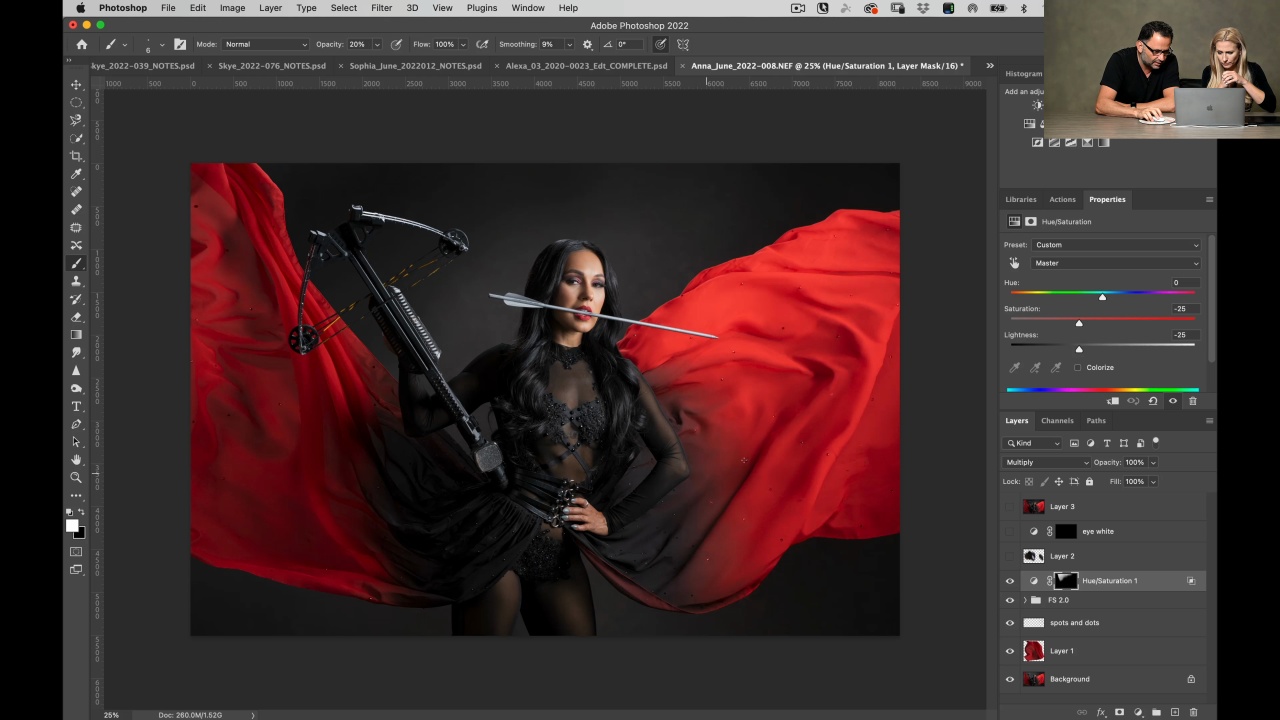
Jerry Review
In this lesson Jerry reviews the steps that were done to retouch this Portrait and how it culminated in this bedazzling Anna Dangerous Masterpiece.
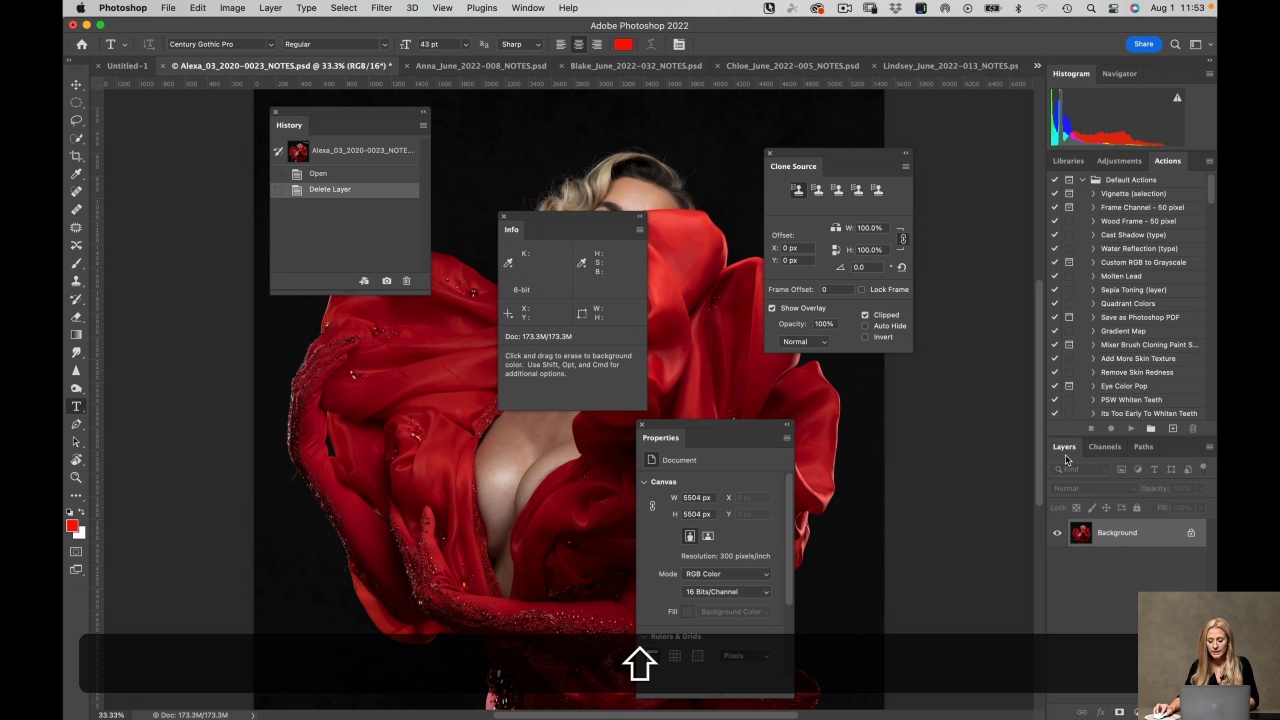
Alexa Fashion Cover
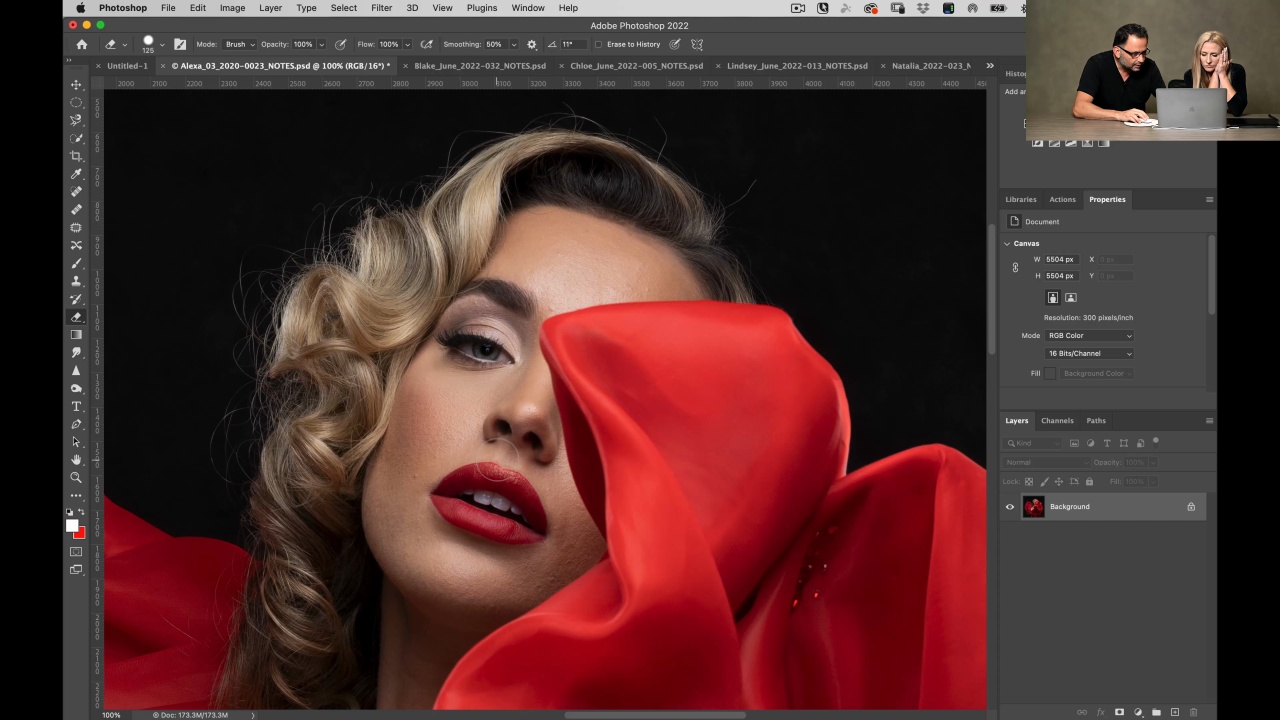
Introduction
In this lesson, you see what we will be retouching to get Alexa looking alluring and worthy of a fashion magazine cover.
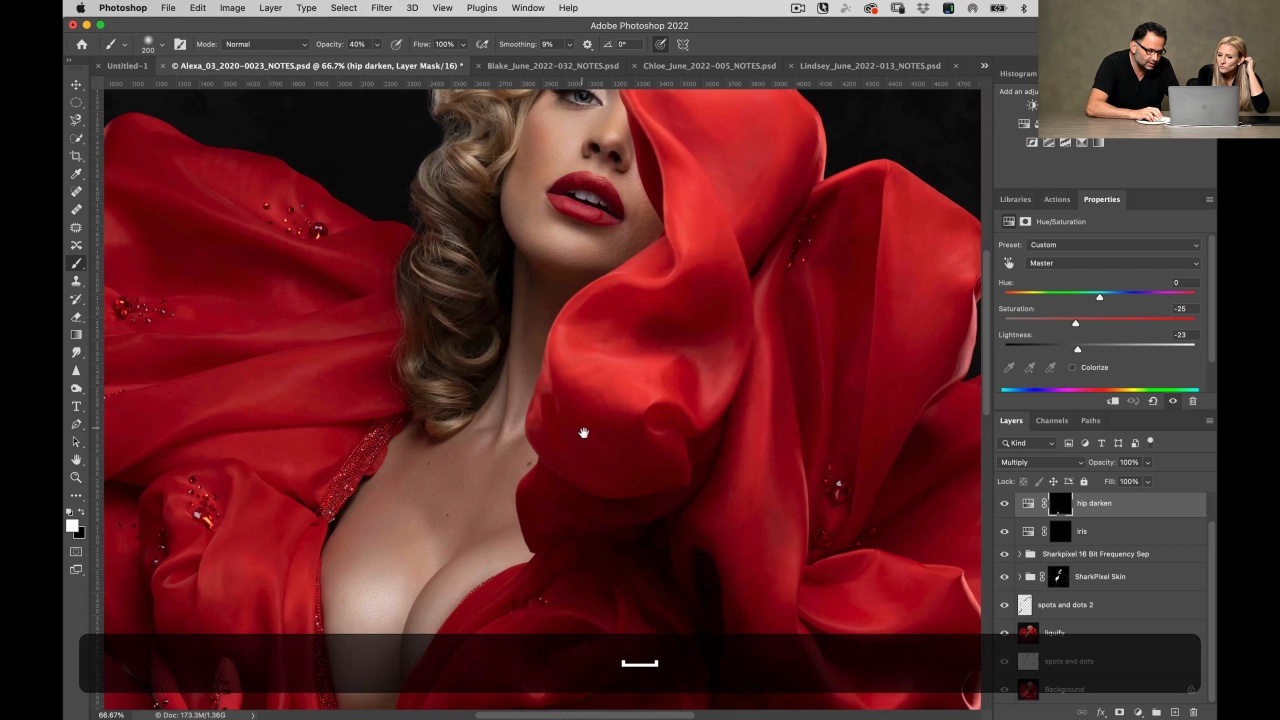
Retouch
In this lesson, you see what methods to use to remove flyaway hairs, how to smooth a dress, how to enhance the eyes, how to load and use the Neural Skin action to give Alexa great-looking skin. The...
Jerry Review
In this lesson, you learn the overall rule on what to remove and what to leave applied to Alexa's Portrait. Resulting in this final Fashion Portrait Masterpiece.
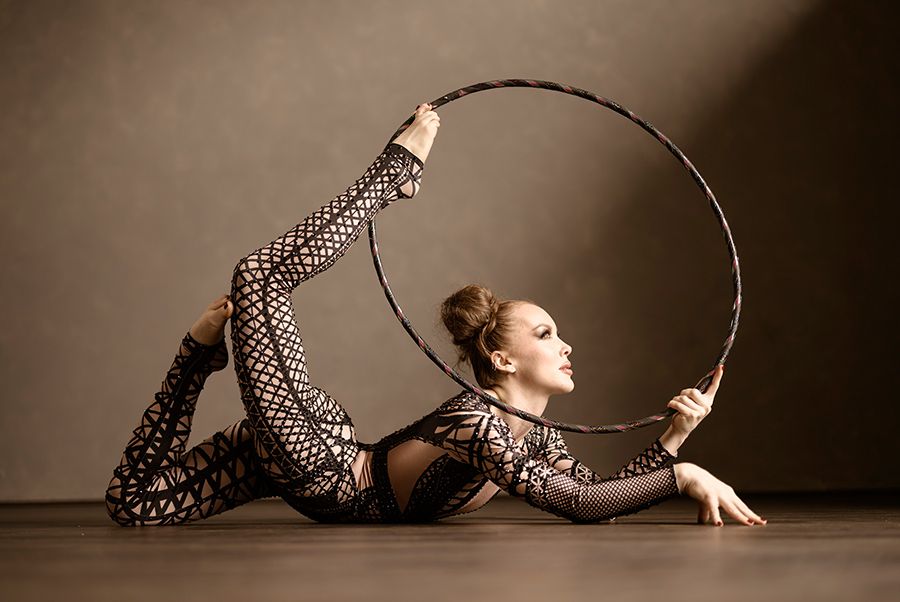
Cheryl the Contortionist
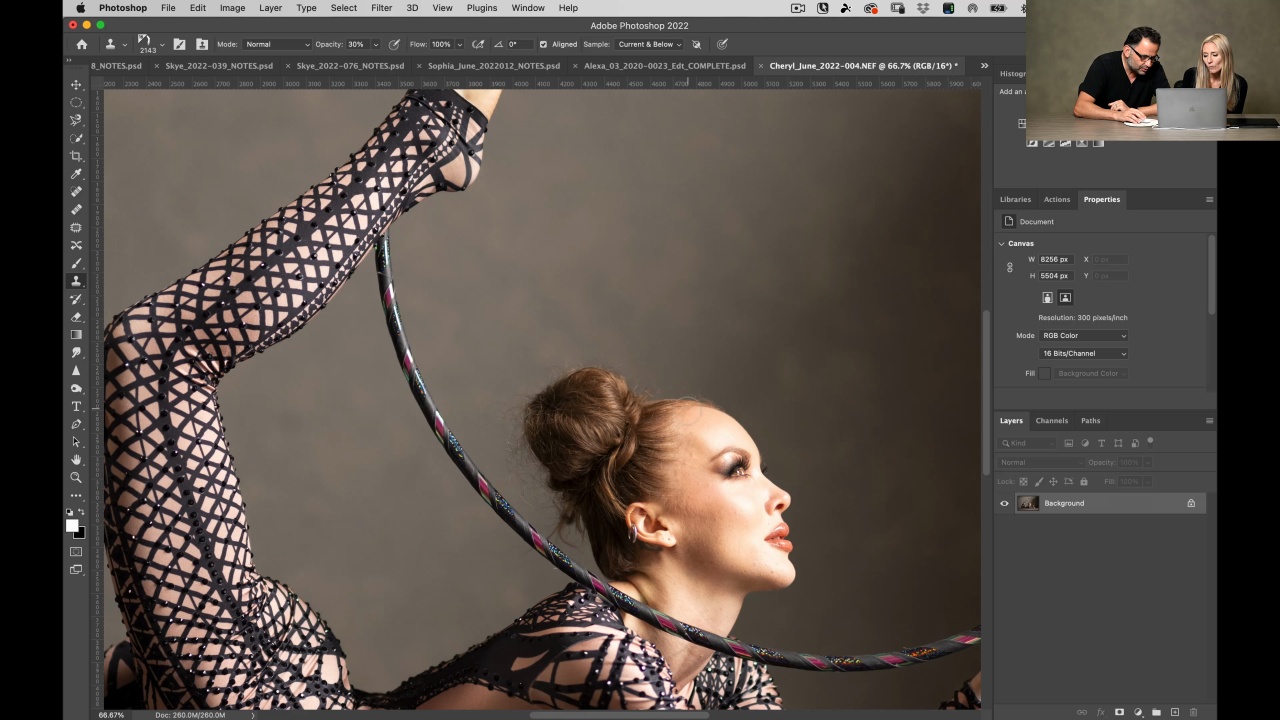
Introduction
In this lesson, you learn what should be retouched to pull off this Portrait of Cheryl the Contortionist. In order to allow you to be as flexible in Photoshop as Cheryl is in real life.
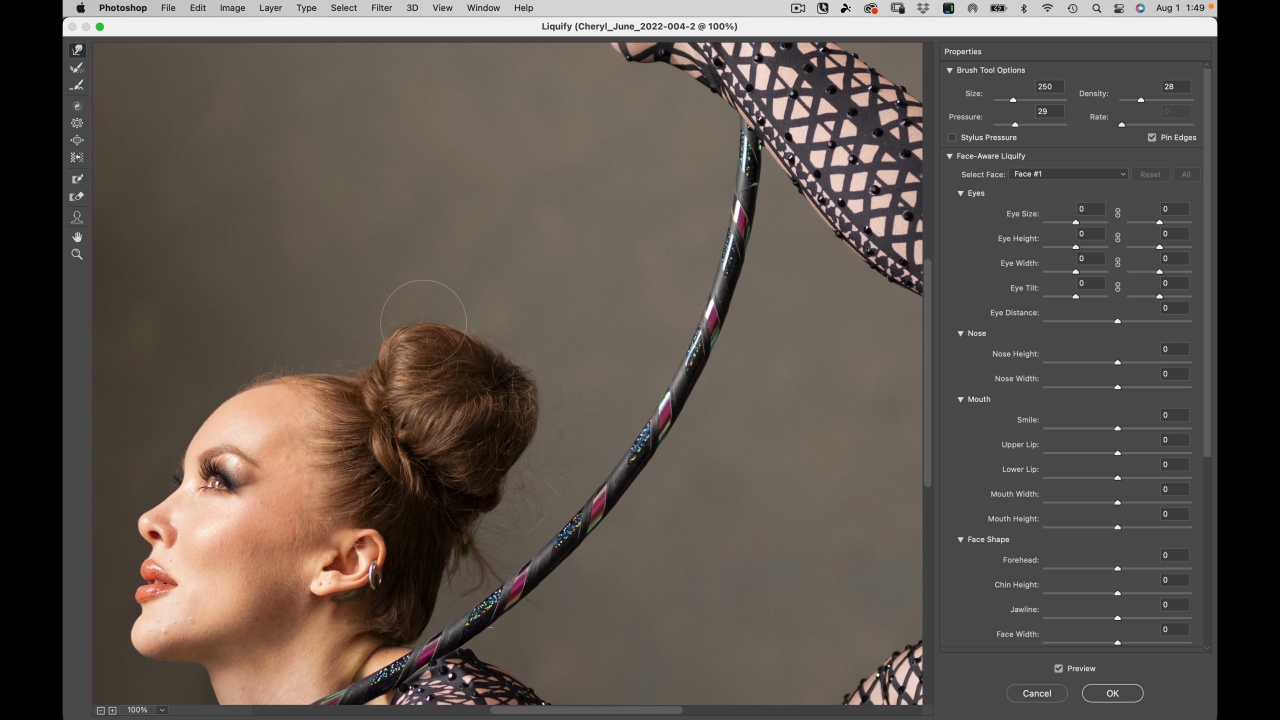
Fixing the Hair
In this lesson you learn how to adjust Cheryle’s hair by removing flyaway hair and adjusting her hair bun. You will learn several techniques that make this much easier than expected
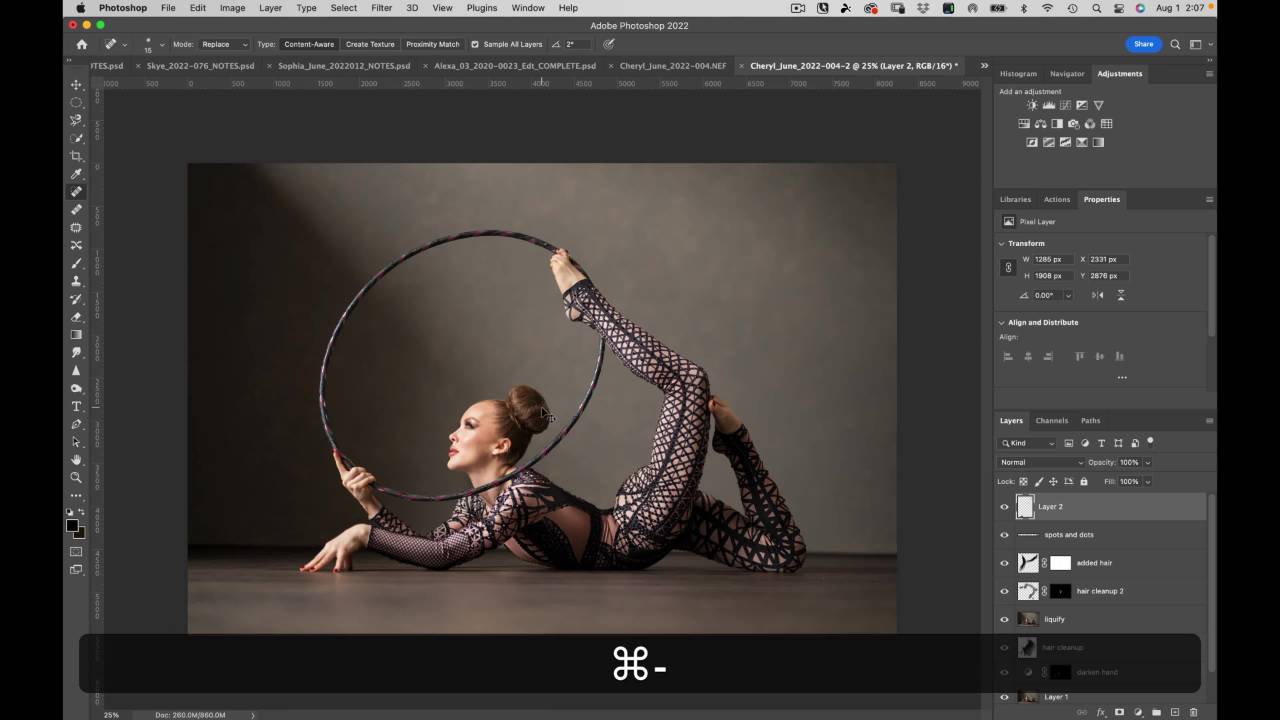
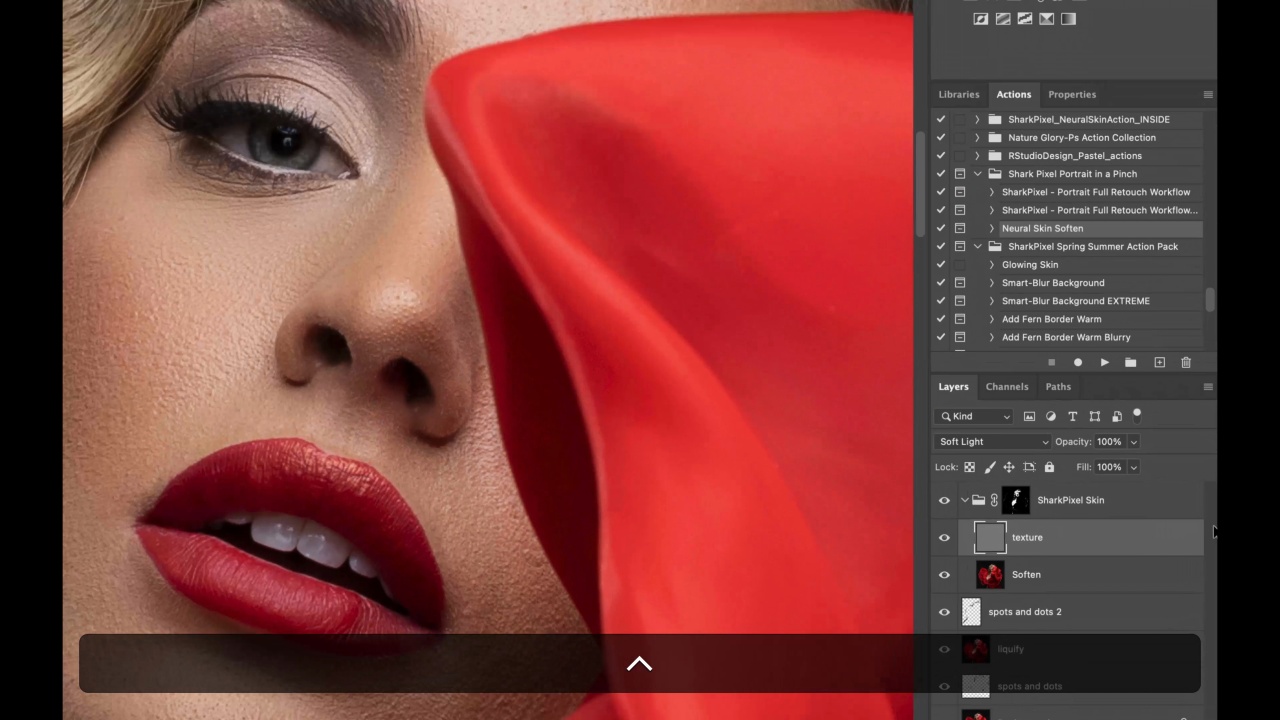
Spots and Dots
In this lesson you learn how to remove spots and dots throughout the image for a beautiful whole so one can focus on Cheryle dexterity and not be distracted by tiny flaws.
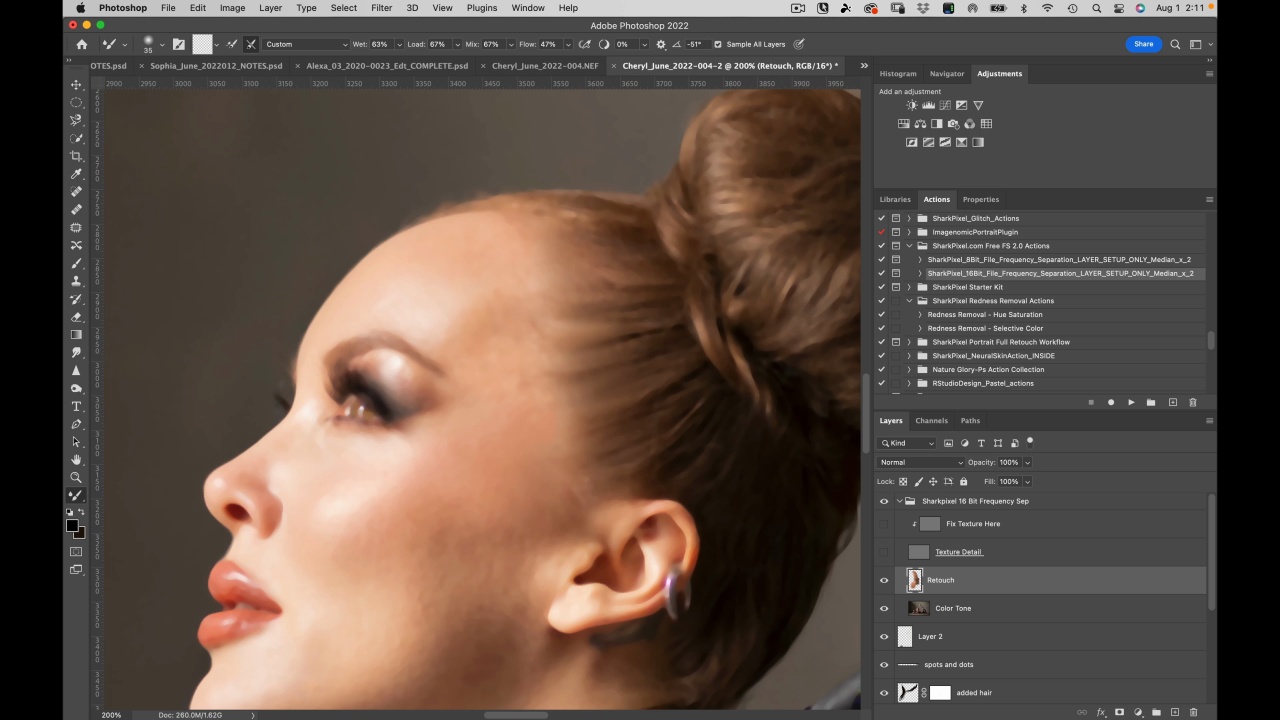
Perfect Skin
In this lesson, you learn how to use frequency separation to get perfect skin - you will learn how much faster it is using a Photoshop action to get the effect you want.
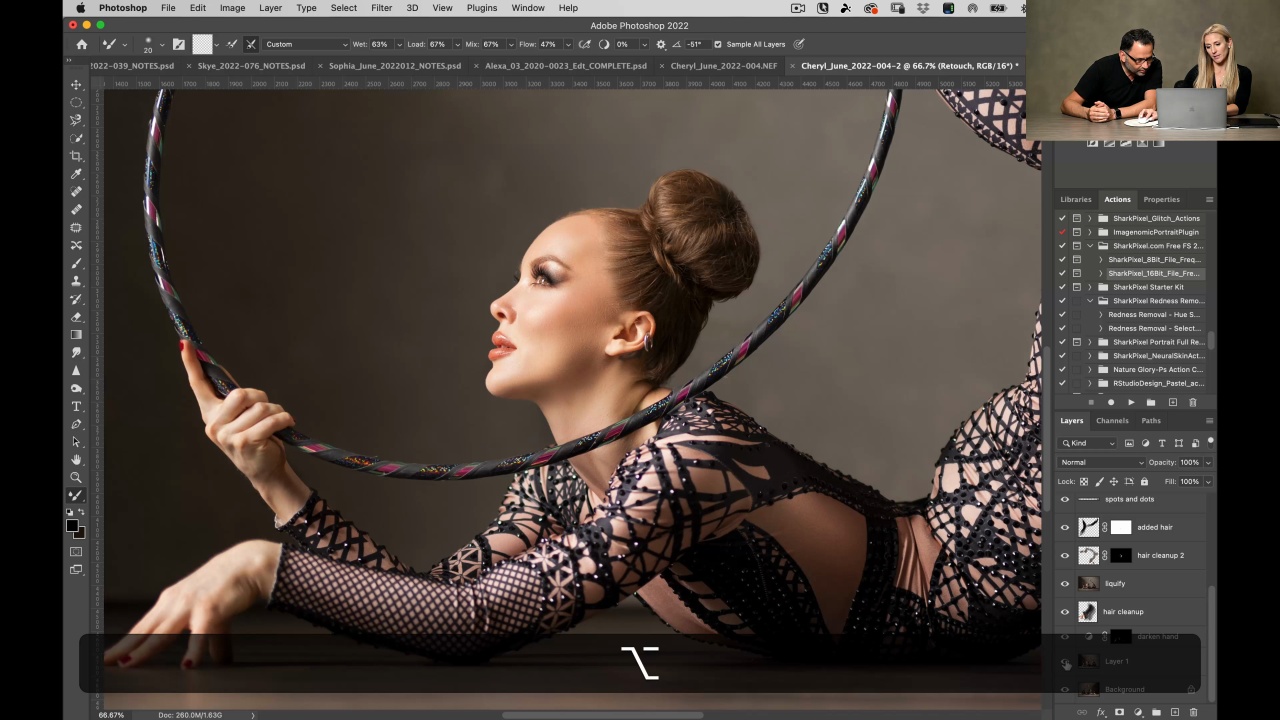
Jerry Review
In this lesson, you see Jerry review with Kristina what was done and whether anything else is needed to be adjusted.
Chloe Rustic Outdoors
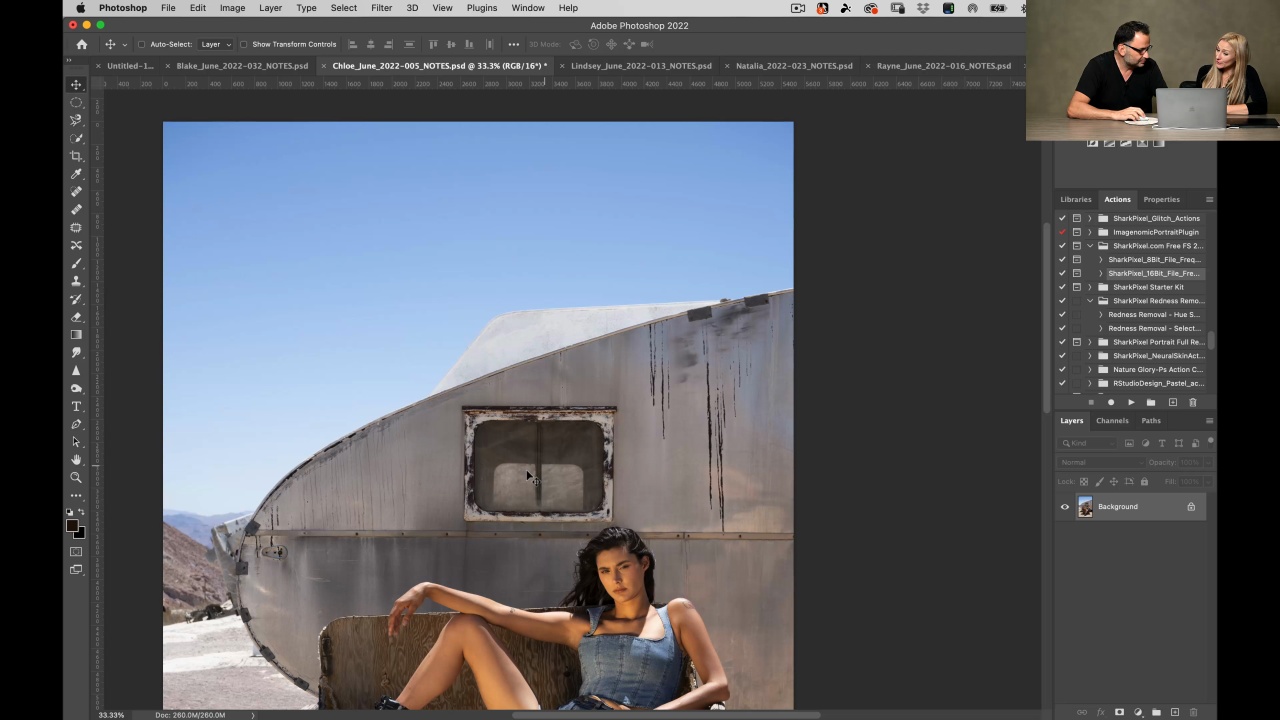
Introduction
In this lesson you learn how to bring out the best in this outdoor Portrait of Chloe in front of a silver camper.
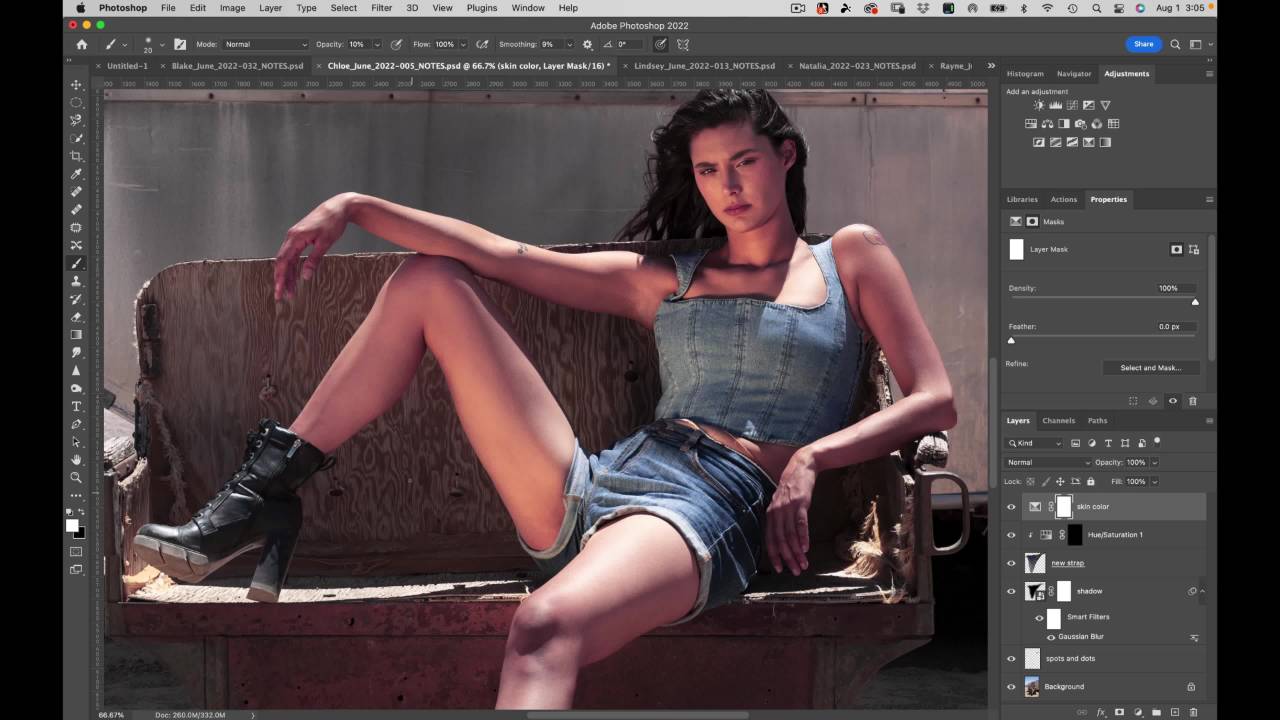
Skin Edits
In this lesson you learn how to correct and enhance Chloe’s skin, so we have smooth-looking skin. Then you learn how to adjust a shoulder strap and how to reduce the yellow cast on the overal...
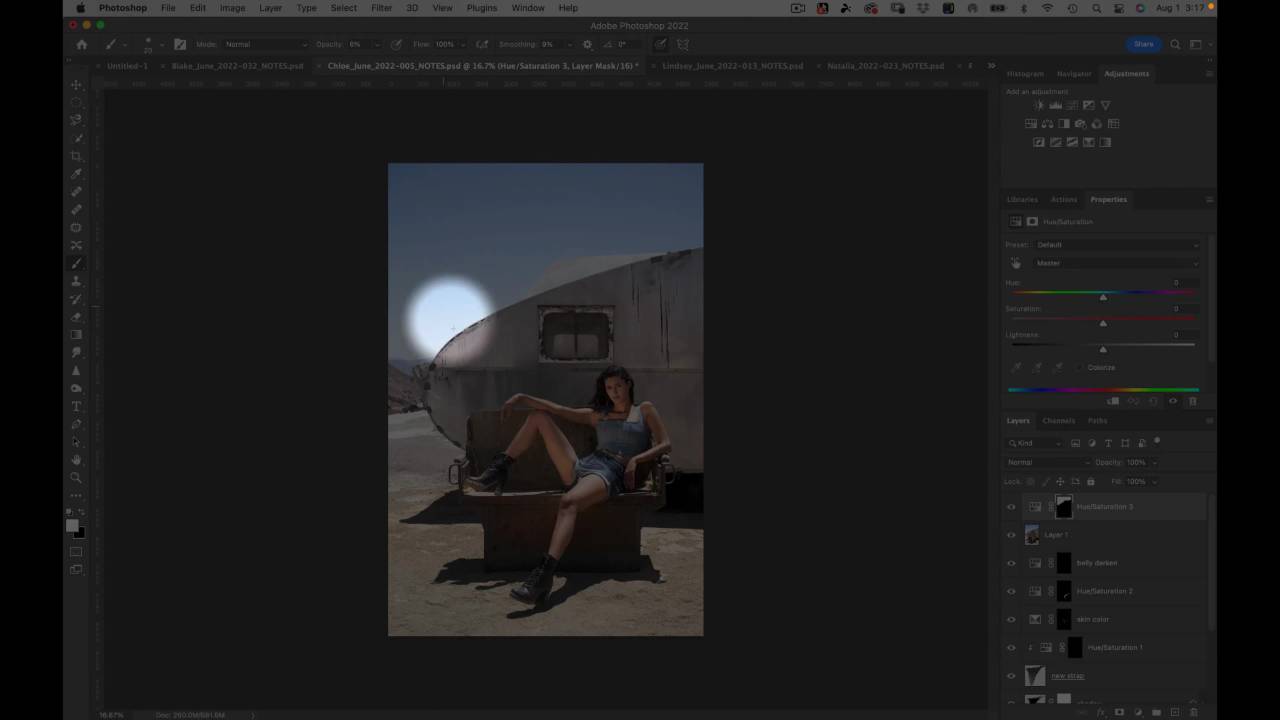
Even out the Eyes
In this lesson you learn how to even out the eyes using the liquefy tool - so it does not look like Chloe is squinting. Then you learn how to darken hot spots, the sky, and the foreground selectively.
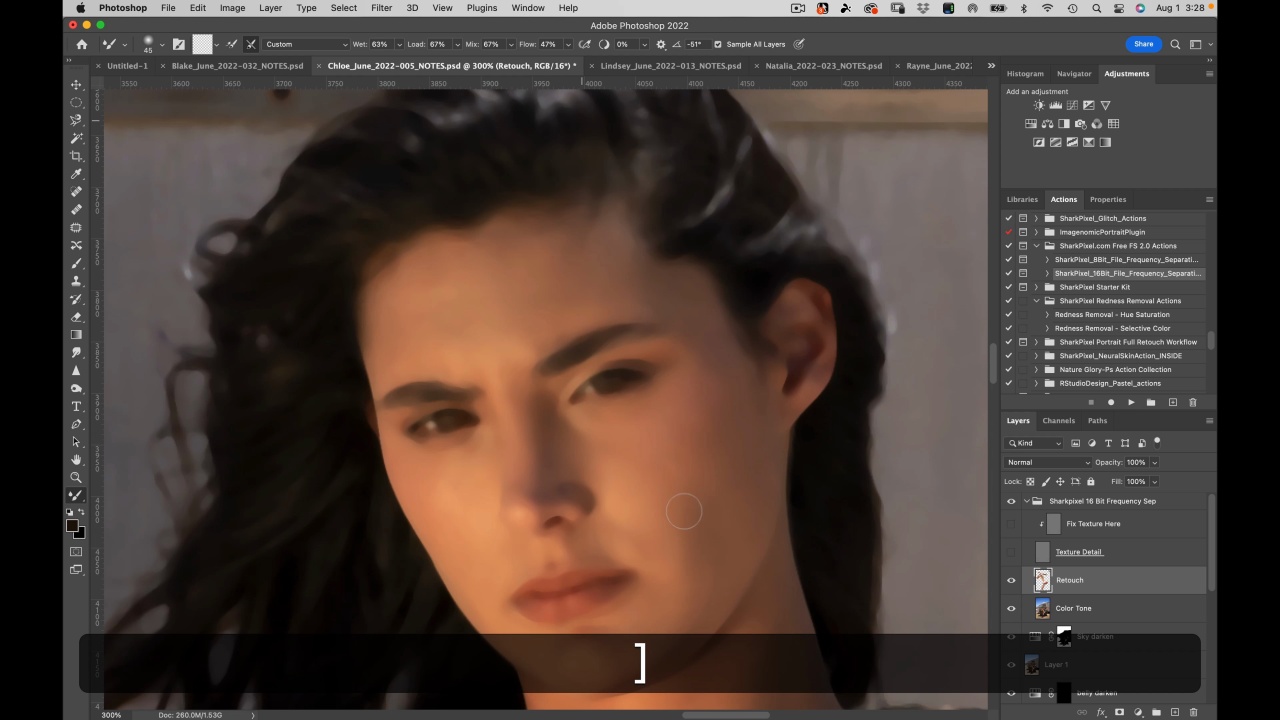
Frequency Separation
In this lesson you learn how to use frequency separation to make Chloe’s skin look smooth and flawless in this outdoor setting.
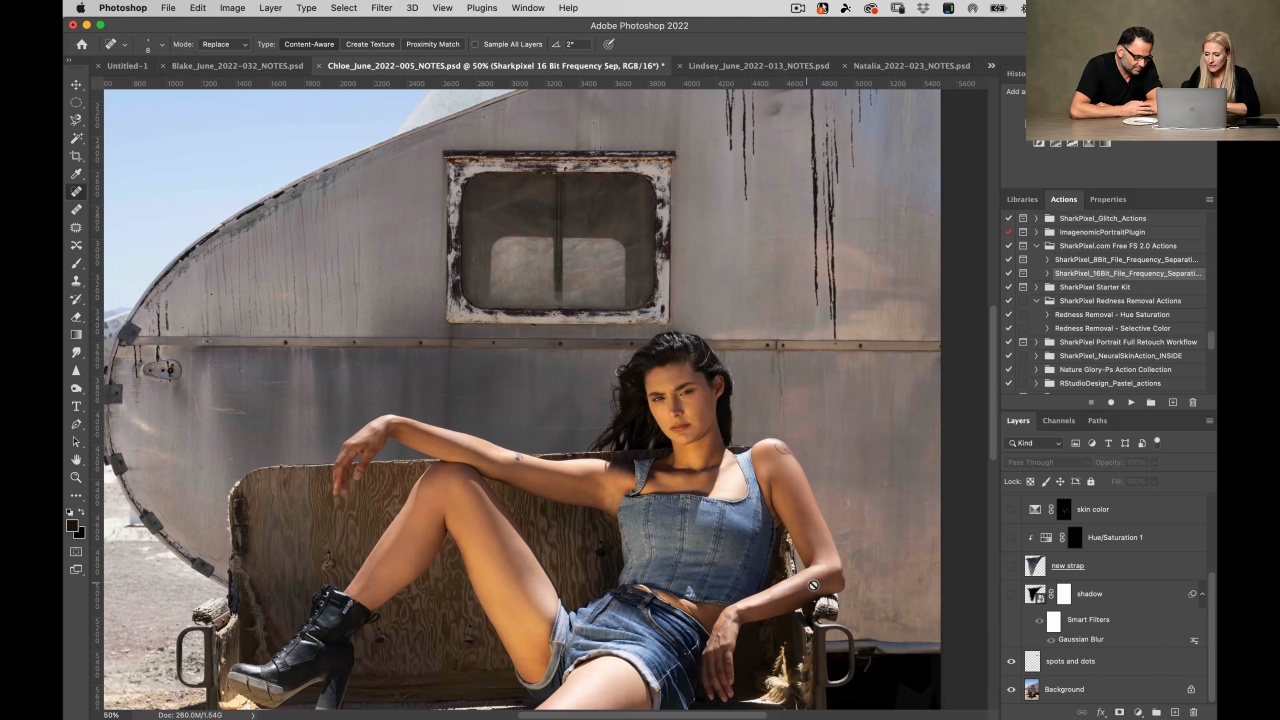
Jerry Review
In this lesson Jerry reviews the image and what was done to make it all come out right and result in this great-looking outdoor Portrait of Chloe.
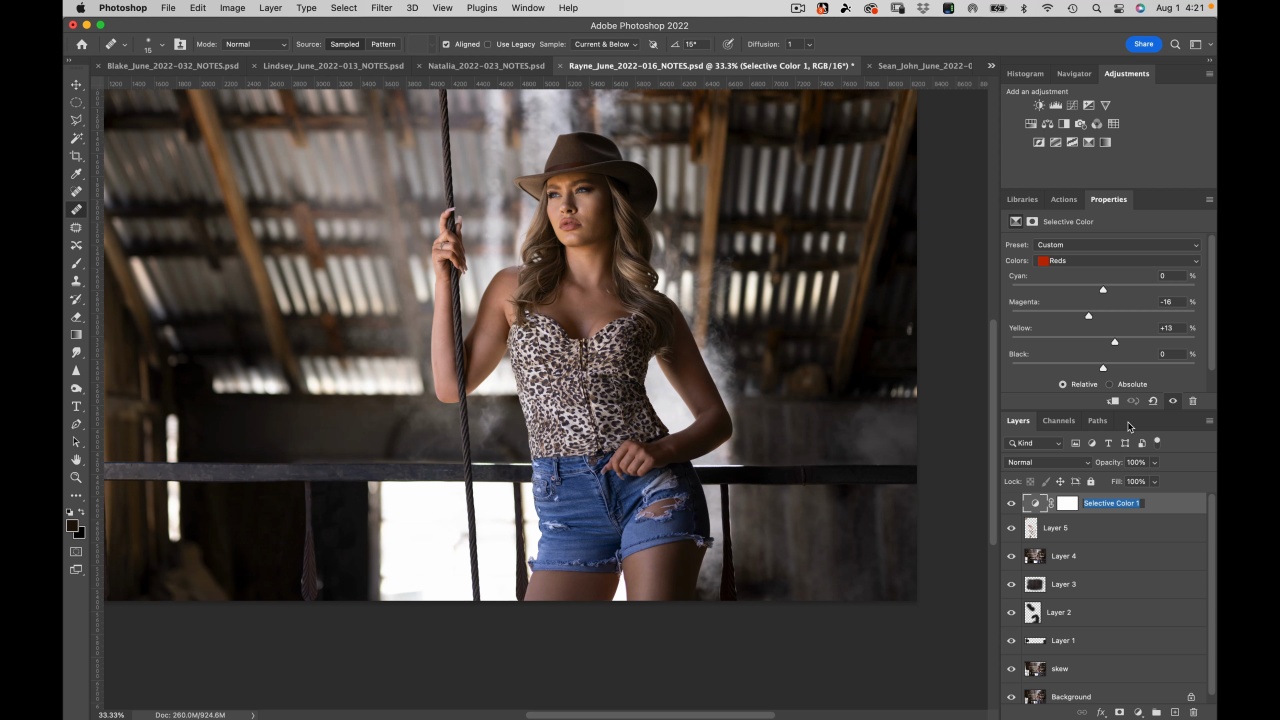
Rayne the Cowgirl
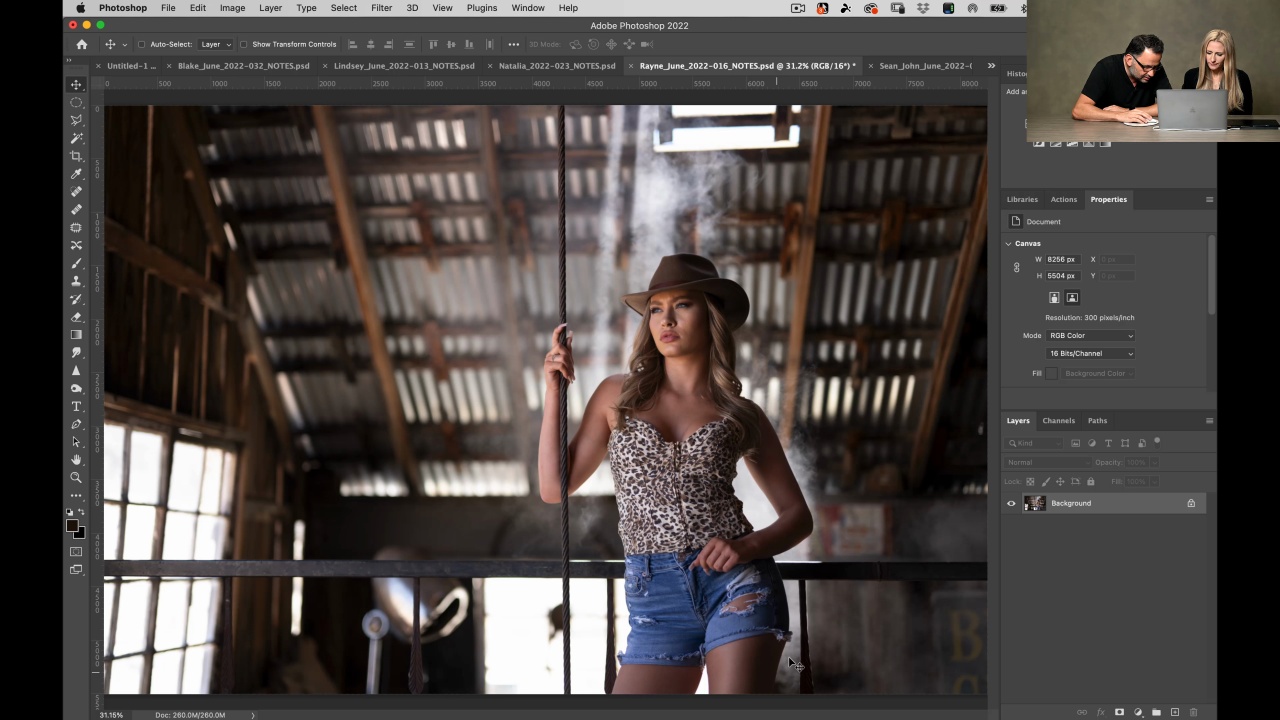
Introduction
In this lesson you learn what needs to be adjusted to make this image of Rayne in a cowgirl outfit in a barn look great and stunning.

Basics Straightening and Edit
In this lesson you learn how to straighten out the image, how to remove unwanted objects and signs from the background.
Liquify and skin
In this lesson you learn how to use liquefy to straighten out the image even further, remove bulges in Chloe’s bodice and to give the skin a uniform smooth texture.
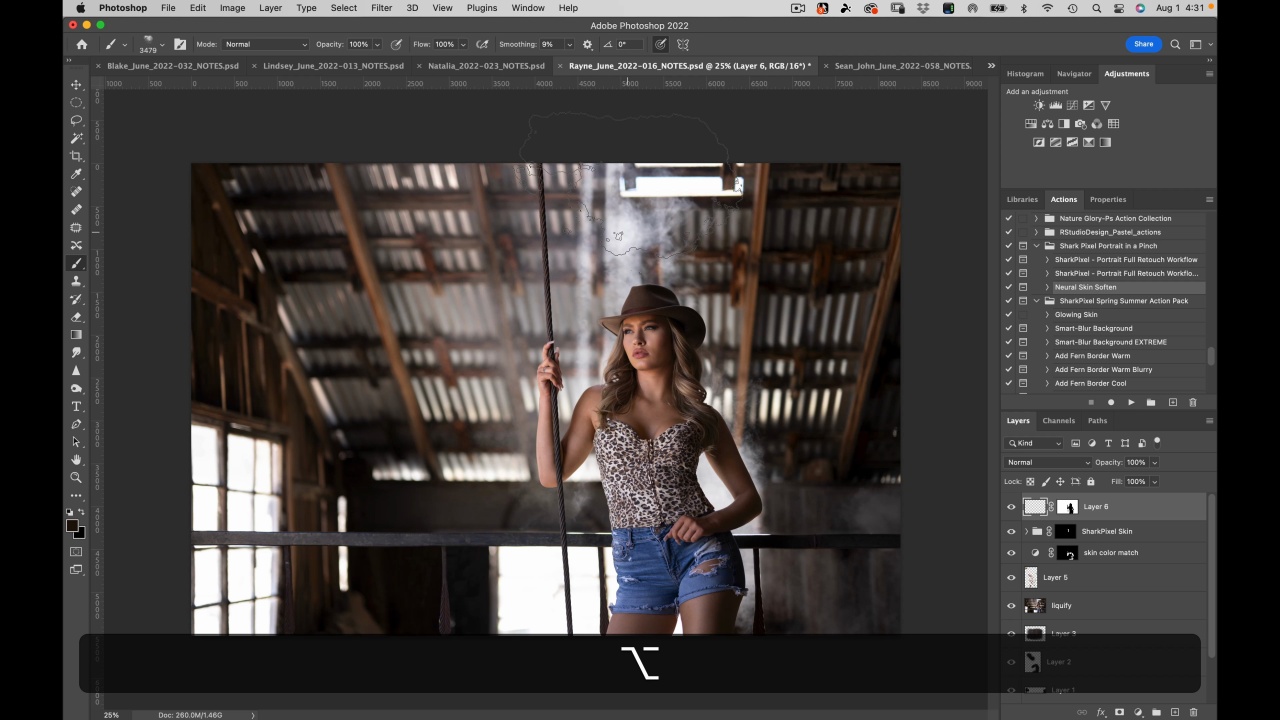
Adding Smoke
In this lesson you learn how to add more smoke using one of the included free smoke brushes, this will add more atmosphere in the back for Rayne and make her stand out further.
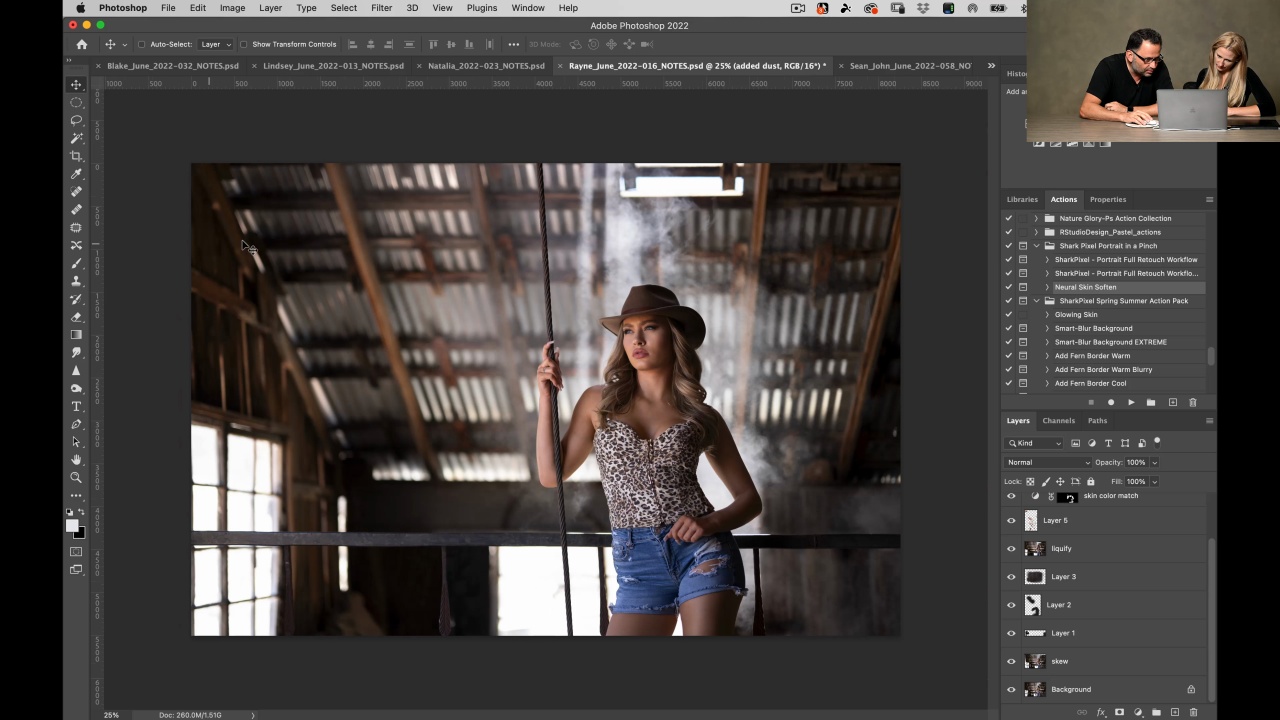
Jerry Review
In this lesson Jerry reviews with Kristina what steps were done to get to this final Cowgirl Portrait Masterpiece.
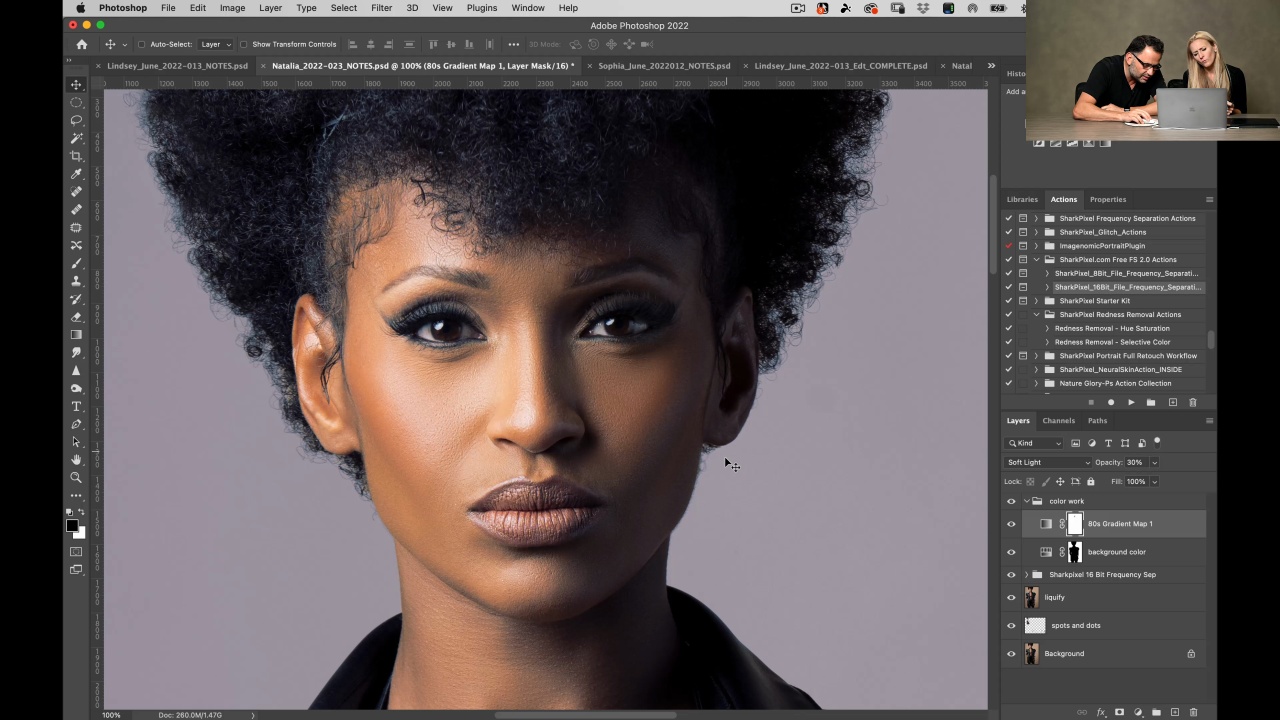
Nathalia in Leather
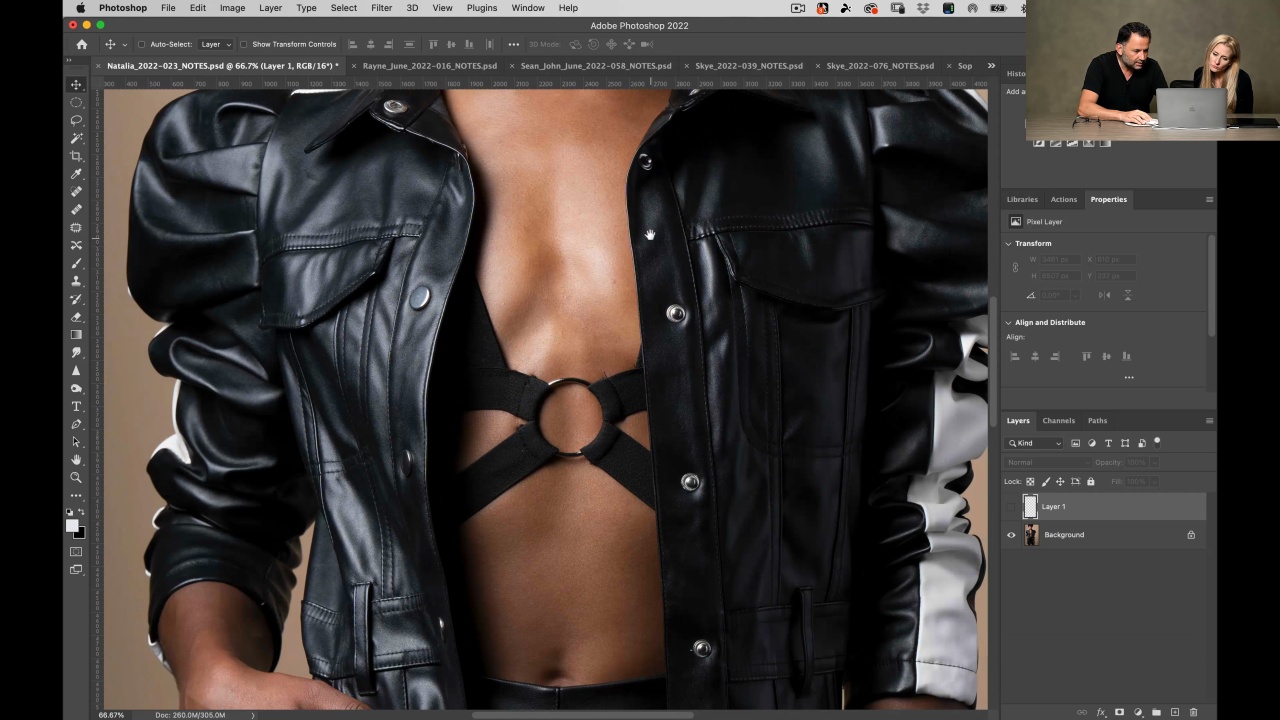
Introduction
In this lesson Jerry goes over with Kristina what is needed to enhance this Editorial Portrait of Nahalia, what items are distractions and what creative license Kristina can use to take it further.
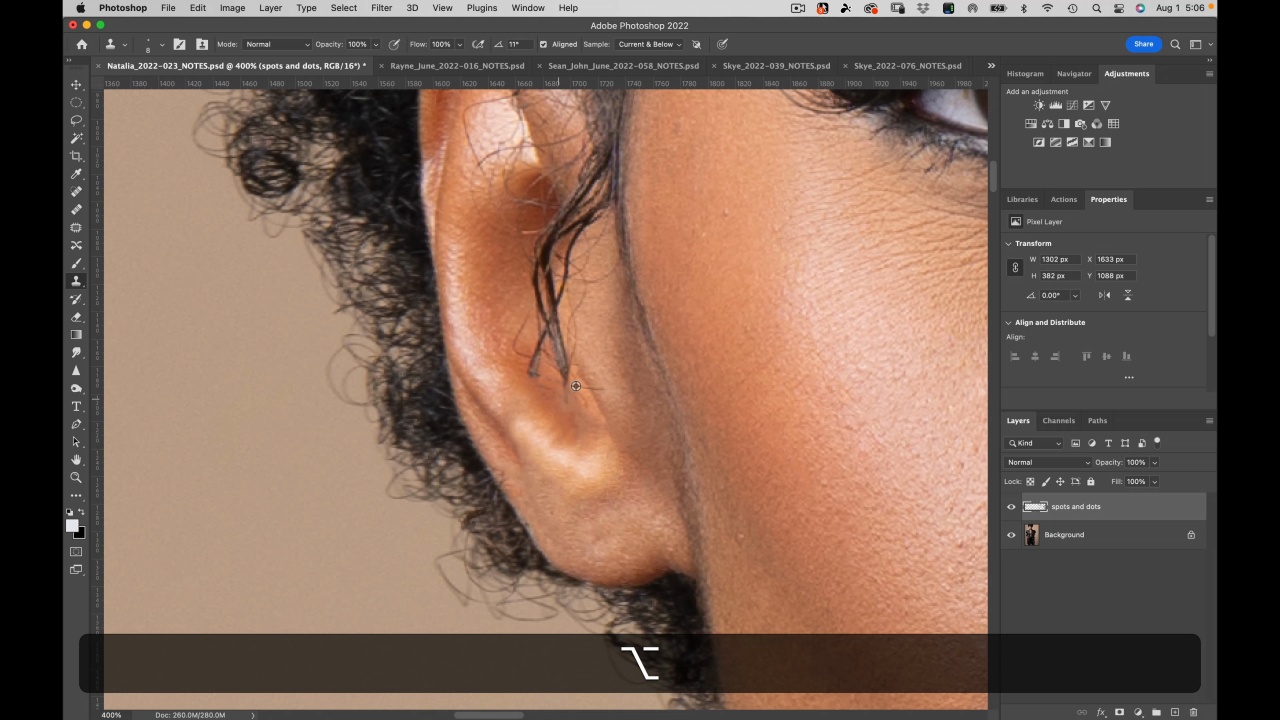
Fixing the Hair
In this lesson you learn how to remove distracting hair overlapping the ears, how to make Natalia’s hair look fuller and how to move the right leg in using the liquify tool.
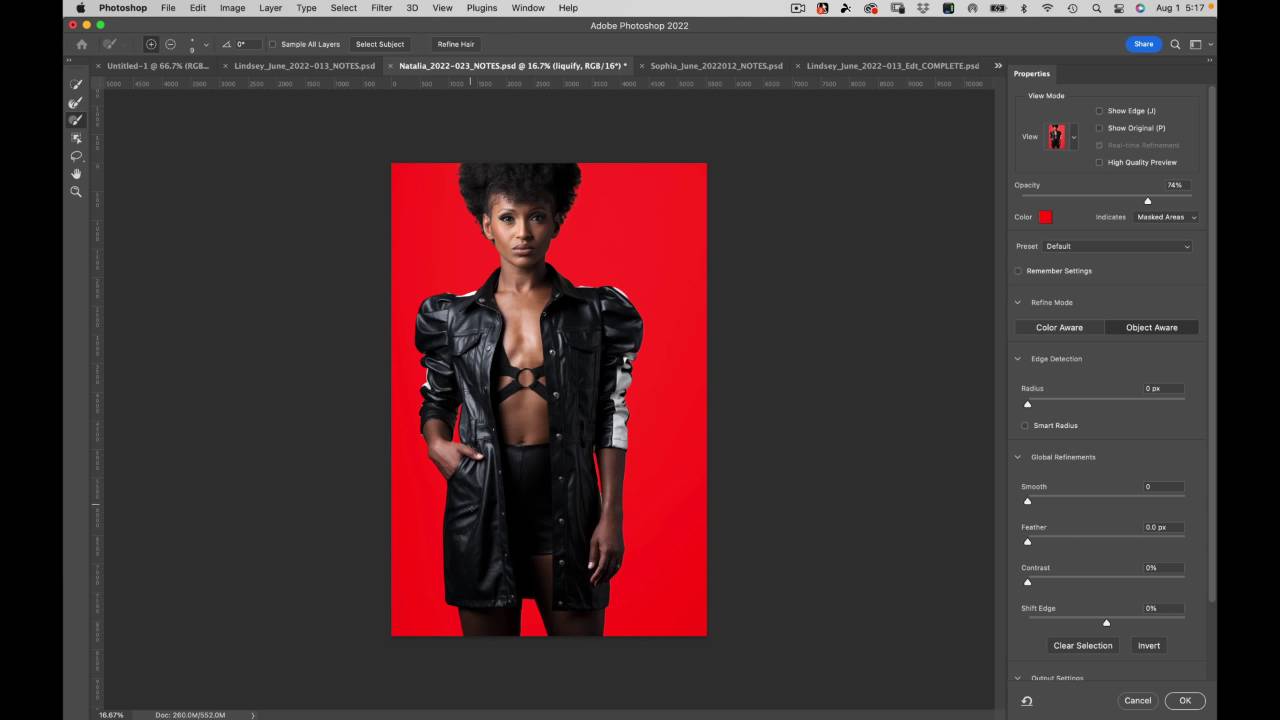
Masking
In this lesson you are going to learn how to select Nathalia and mask her using the AI subject selection tool, then refine that mask using the smudge tool. This then allows you to change the backgr...
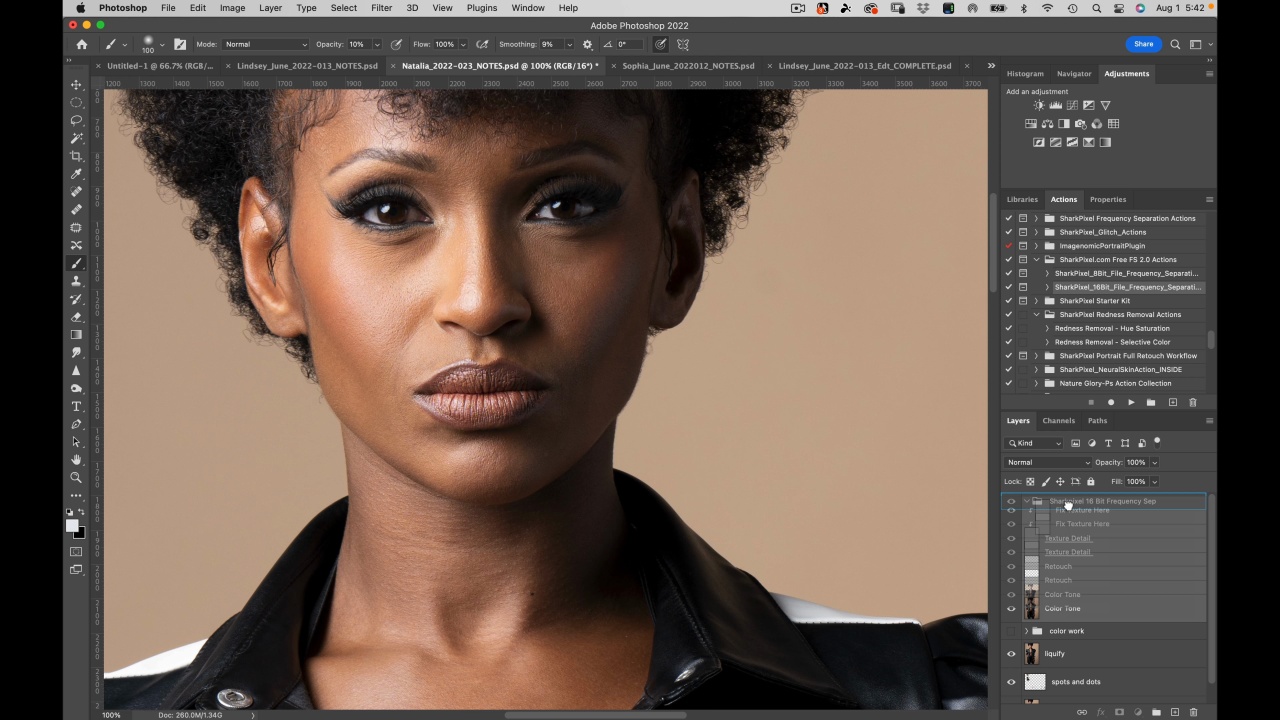
The Background
In this video you learn how to use a gradient mask to give this whole image a unique 80ies look and then use frequency separation to give Nathali smooth flawless skin.
Jerry Review
In this lesson Jerry goes over the final image with Kristina and tweaks any last points that come up and conclude in this final Editorial Portrait Masterpiece.
Lindsay in Gown
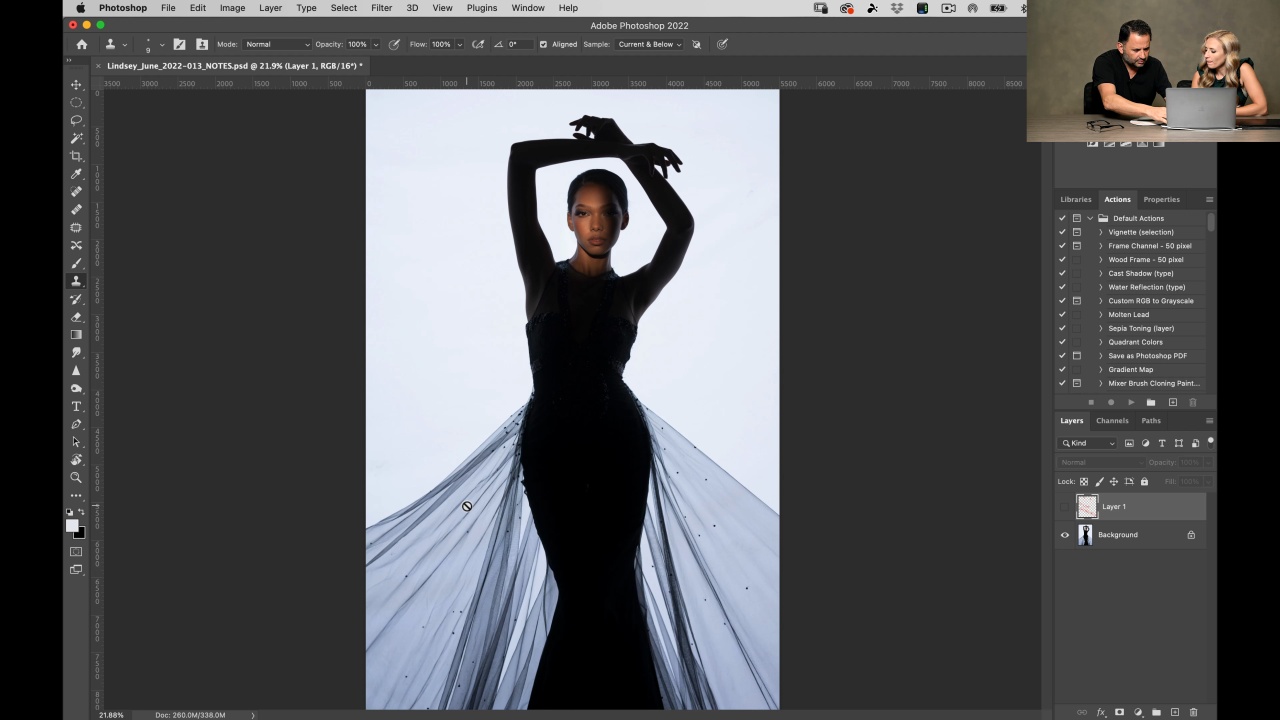
Introduction
In this lesson you learn what we want to enhance to make this interestingly lit Portrait of Lindsay in a Gown come out stunning.
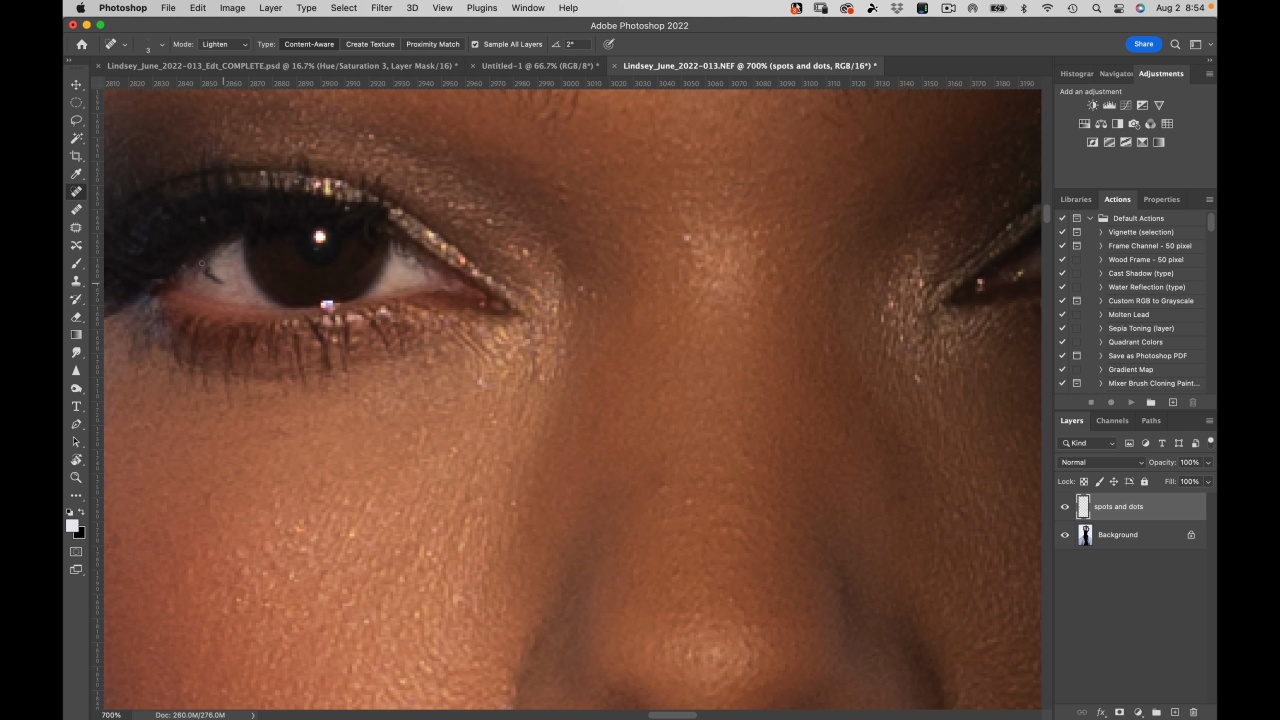
Spots and Dots
In this lesson you learn how to remove spots and dots in Lindsay’s face as well as her nose ring, then we move on to remove any flyaway hairs and remove those.
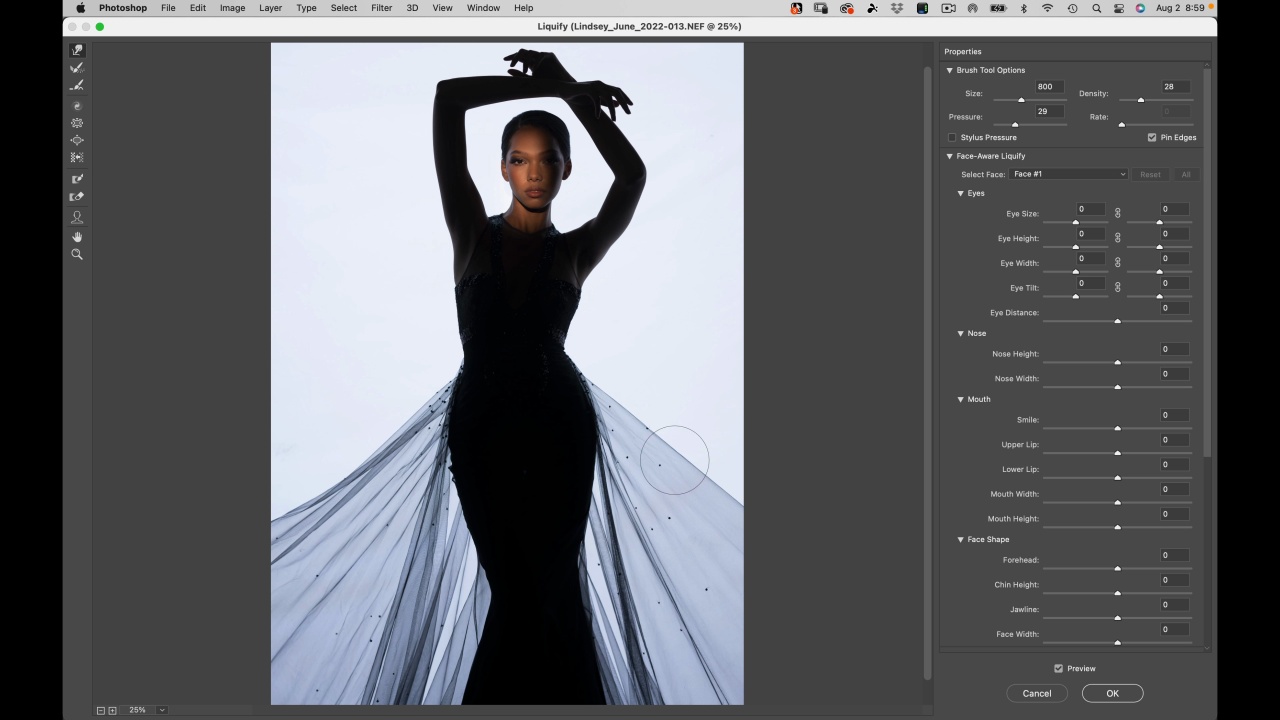
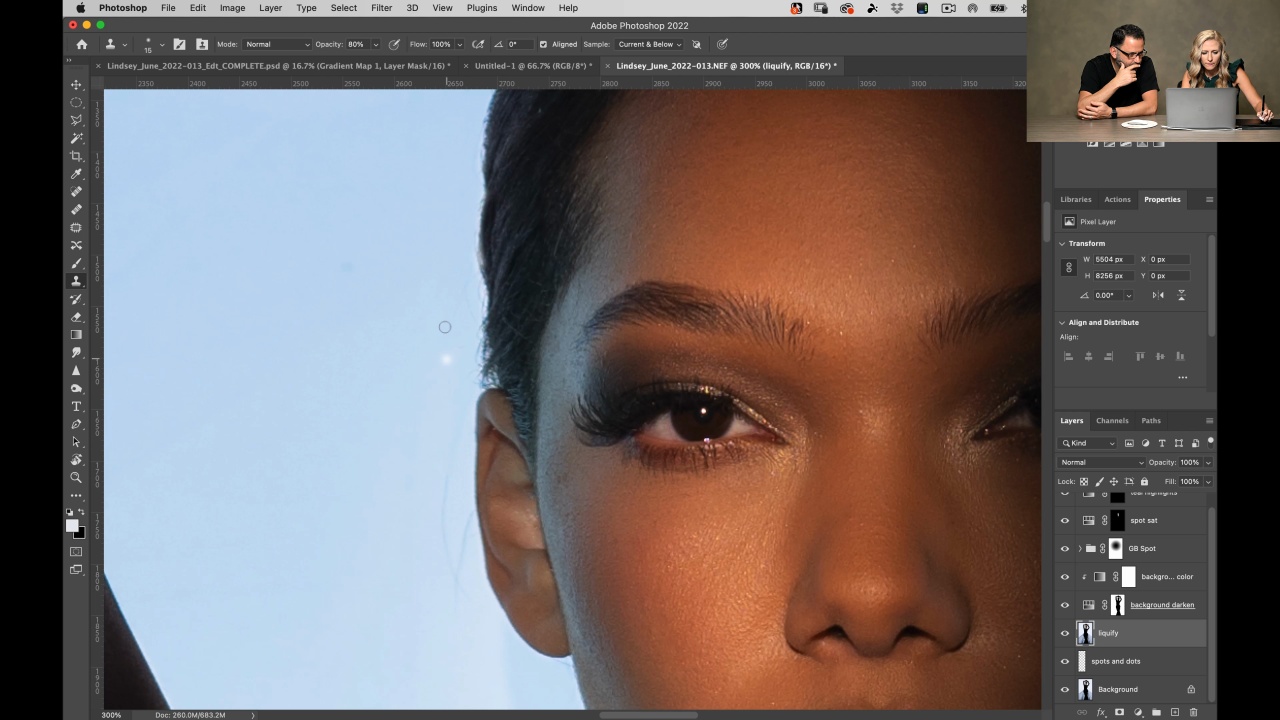
Liquify
In this lesson you learn how to use the liquify tool to remove bulges from Lindsay’s dress and to make her gown train fall more symmetrical.
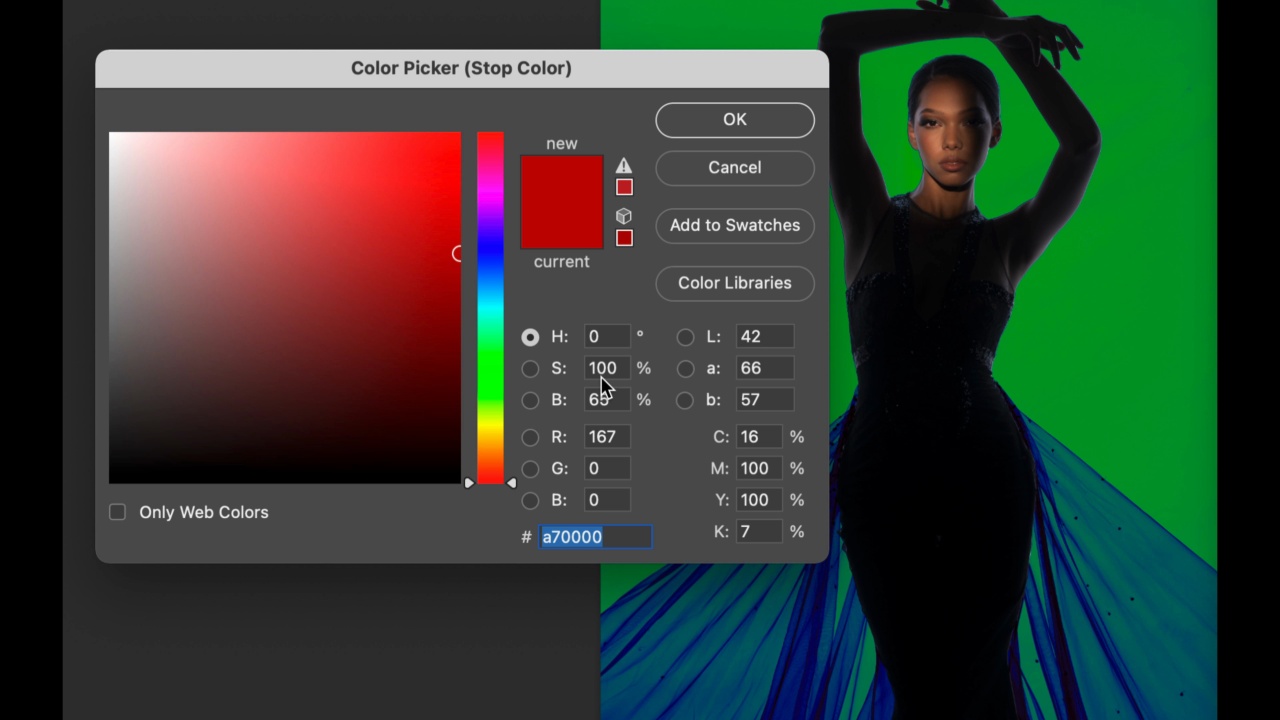
Selections and Color
In this lesson you learn how to change the color of Lindsay’s semi-transparent gown train and separate it from the rest of the picture, then you learn how to add a background color behind her...
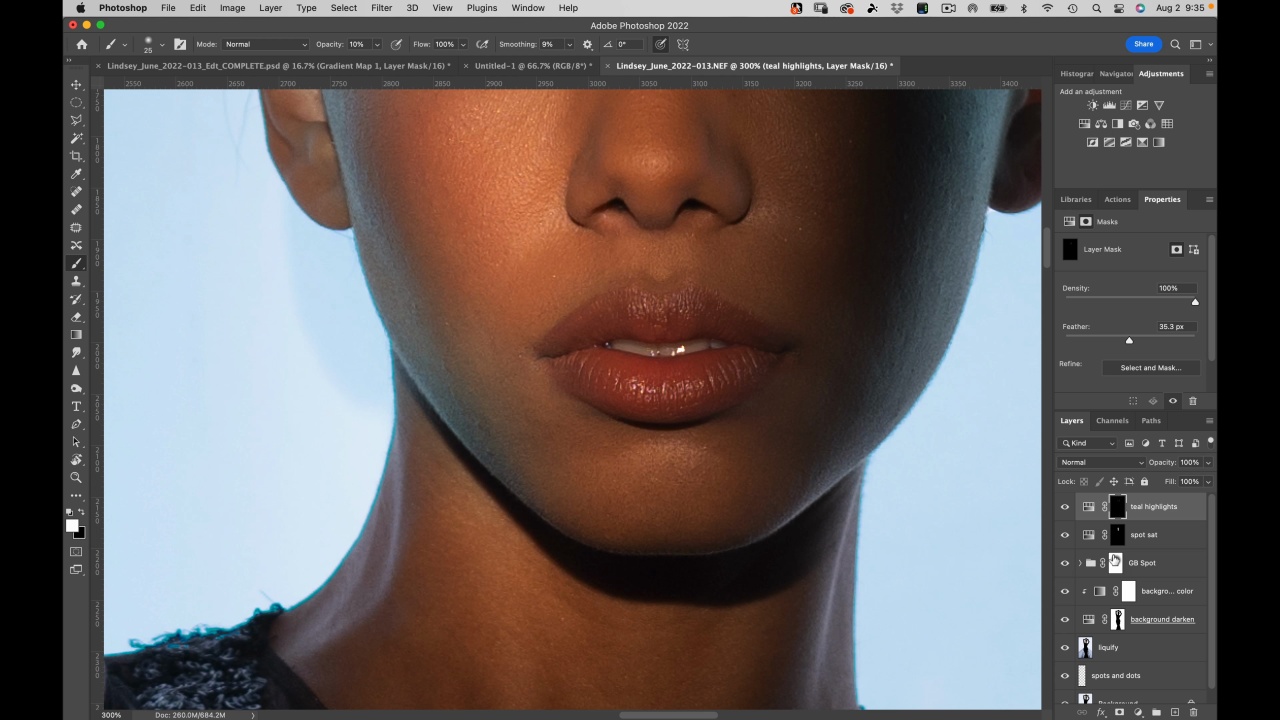
The Face
In this lesson you learn how to add a non-destructive teal tone to the sides of Lindsay's face matching the ambient color we added to the background. Because it is non-destructive, you will be able...
Jerry Review
In this lesson you learn how Jerry reviews this Portrait with Kristina and does any final tweaks that he wants done to result in a final beautiful Portrait of Lindsay.
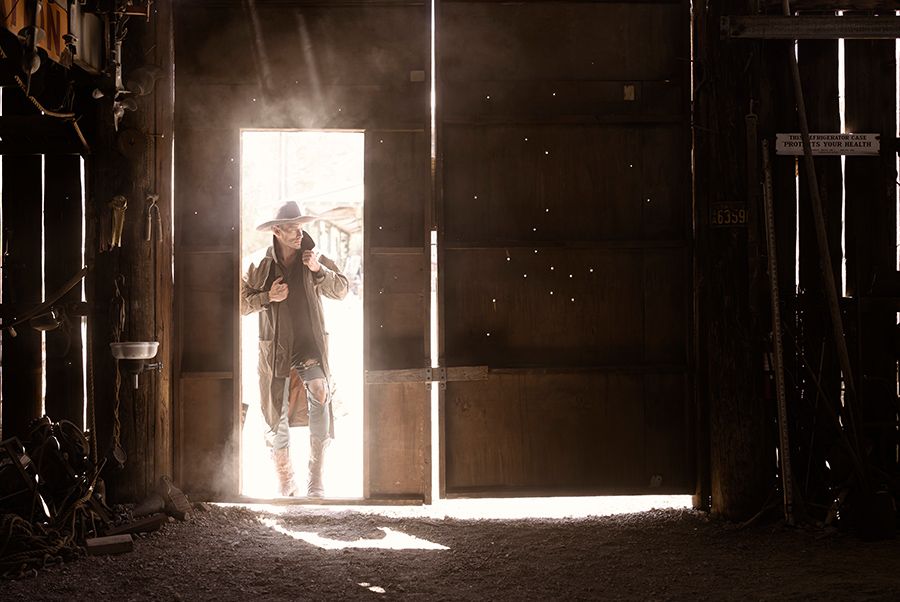
Blake - Cowboy in Barn
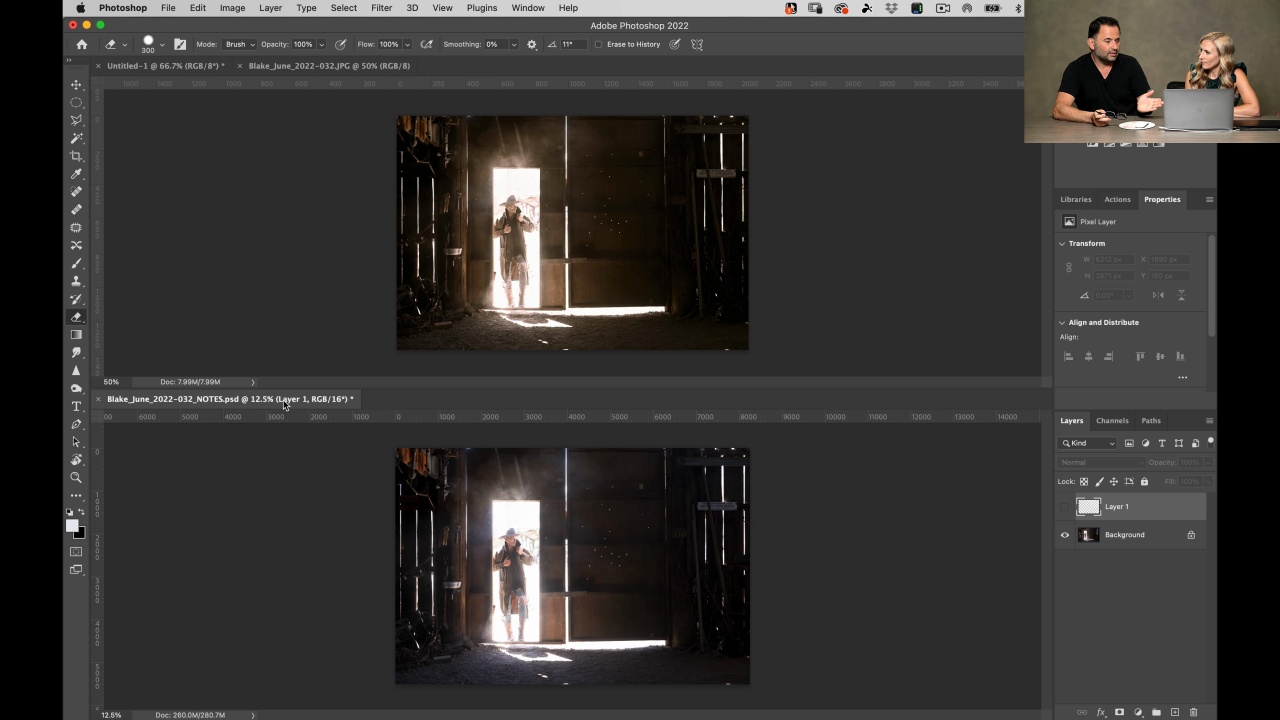
Introduction
In this lesson you learn how the original image was shot and how we plan on emulating this sepia tone feel in this Portrait of Blake the Cowboy.
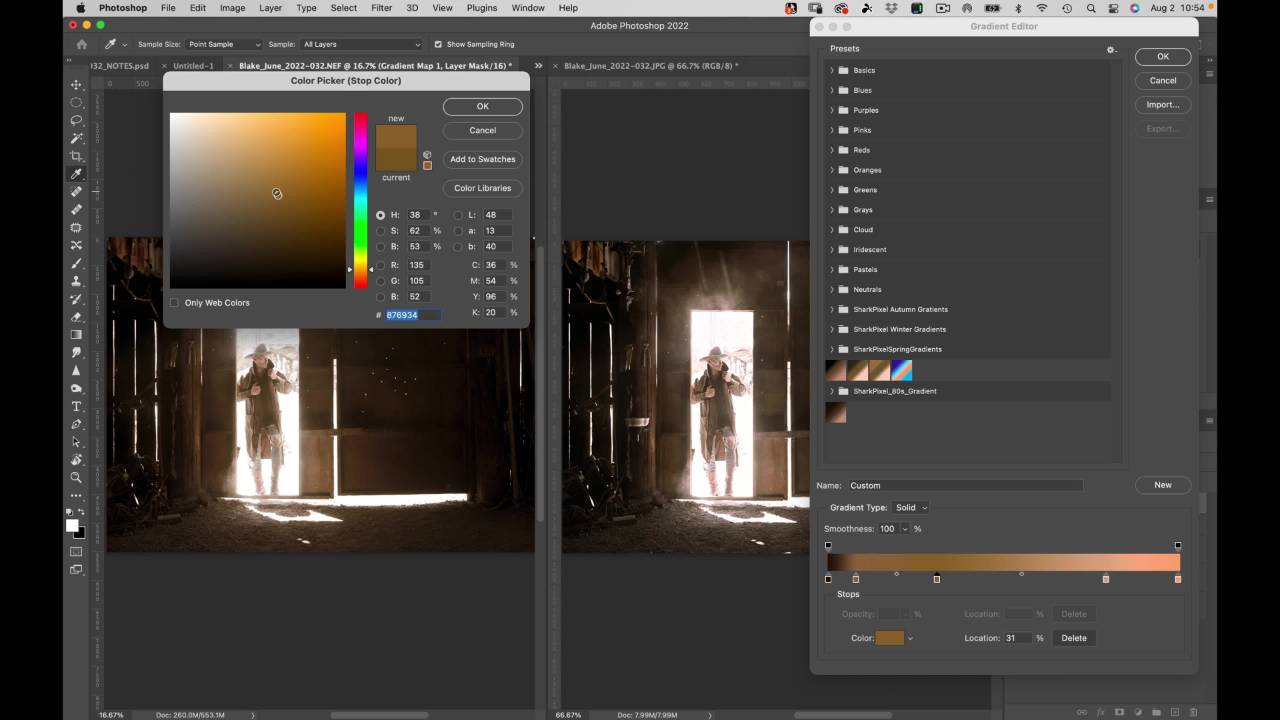
Edit
In this lesson, you learn how we match the color of an original image, and then apply this to another image, you also learn how to remove unwanted objects and signs, and how to paint in dust and mo...
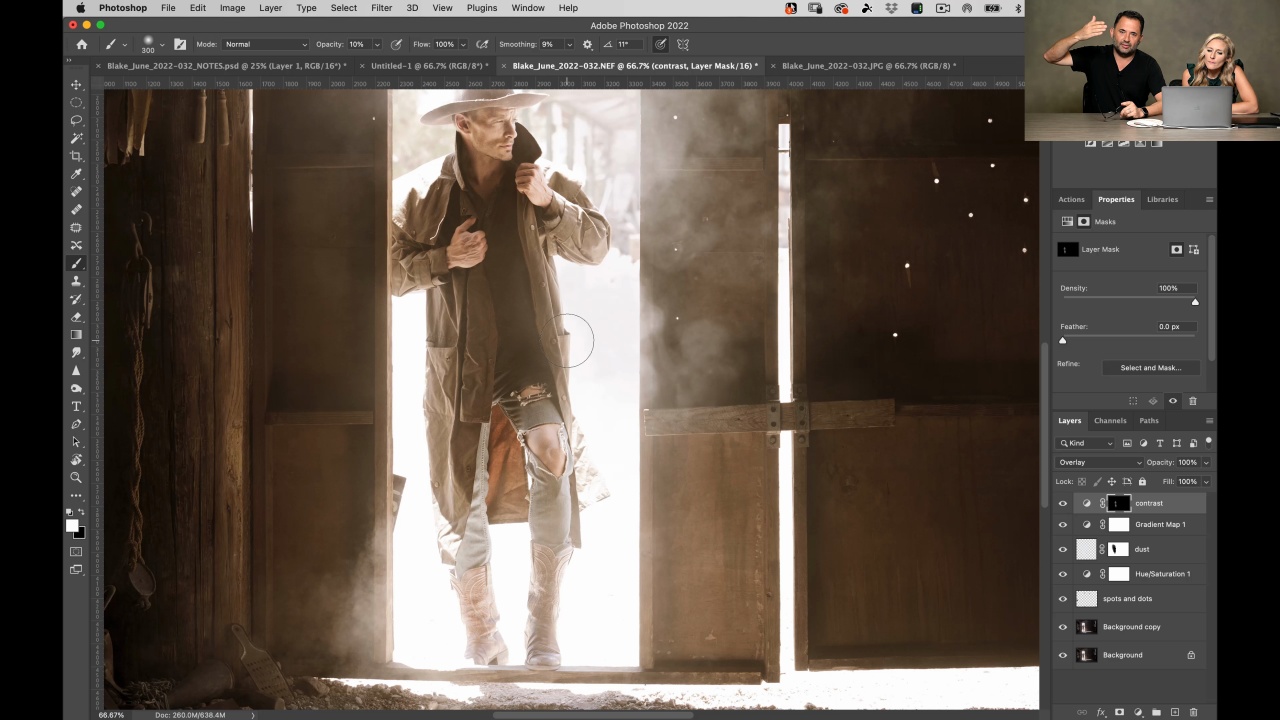
Jerry Review
In this lesson, you see Jerry and Kristina reviewing the image - what was done to make Blake stand out and result in this cool-looking Cowboy in Barn Portrait.
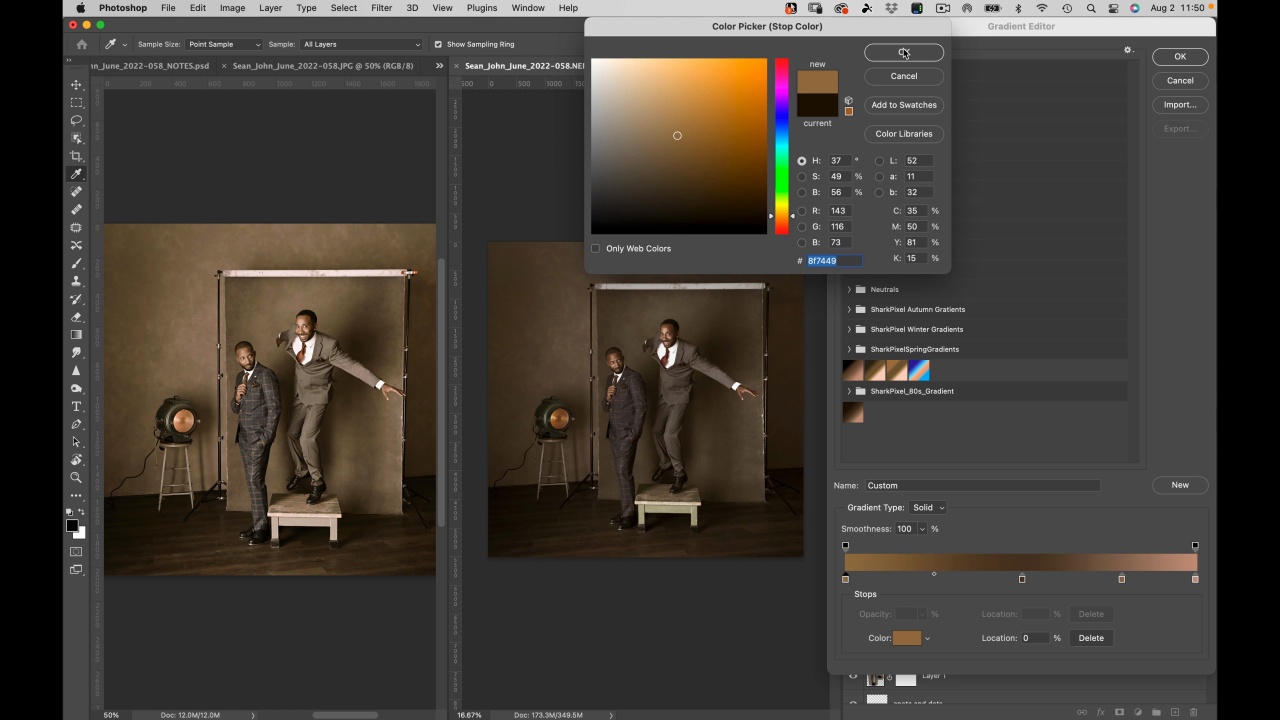
Sean & John Hollywood Style
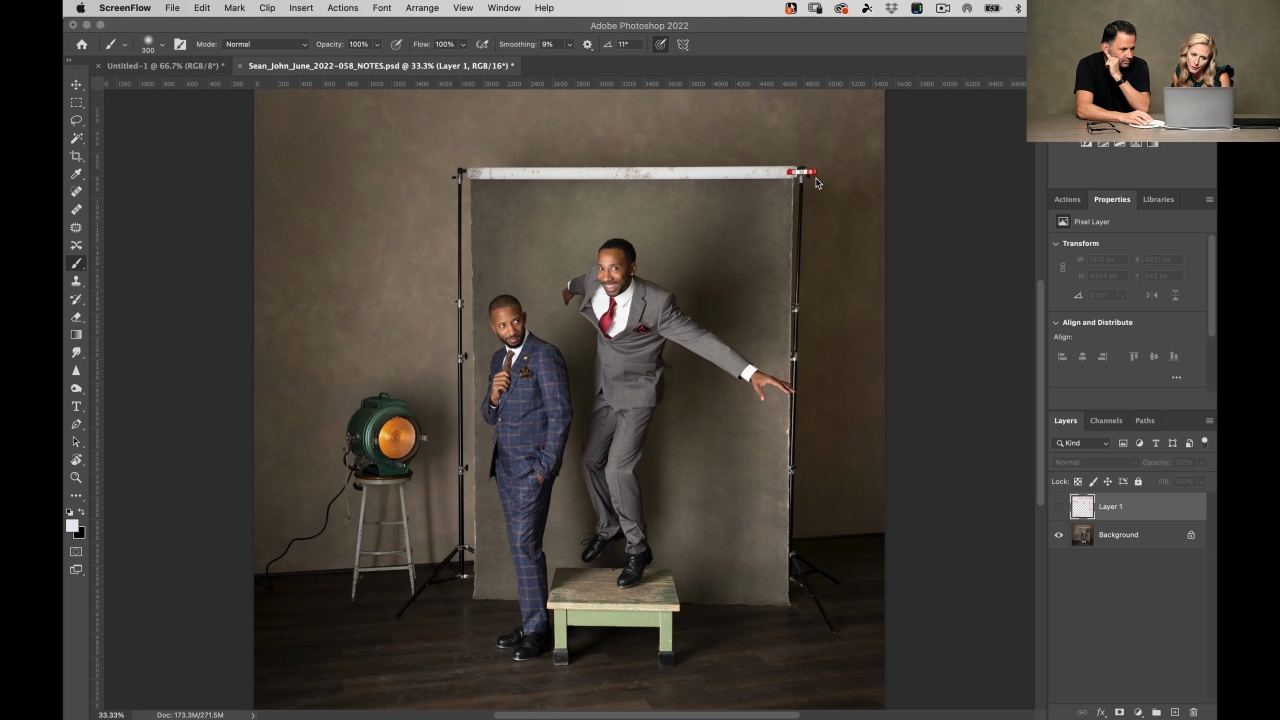
Introduction
In this video we go over what needs to be retouched on this interesting Hollywood Vintage Style Portrait of Sean and John, two amazing professional tap dancers from Las Vegas.
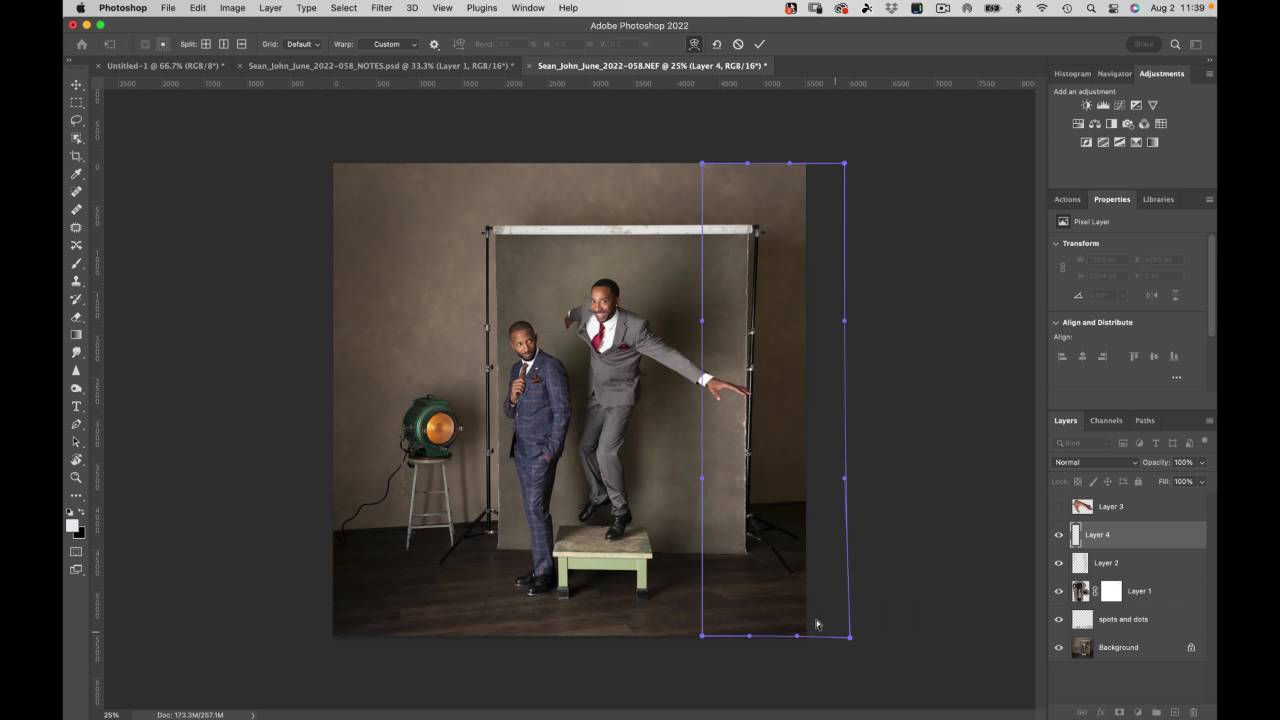
Edit
In this lesson you learn an interesting new way to remove unwanted objects from the background, such as a clamp holding the canvas, then you learn how to extend the backdrop slightly.
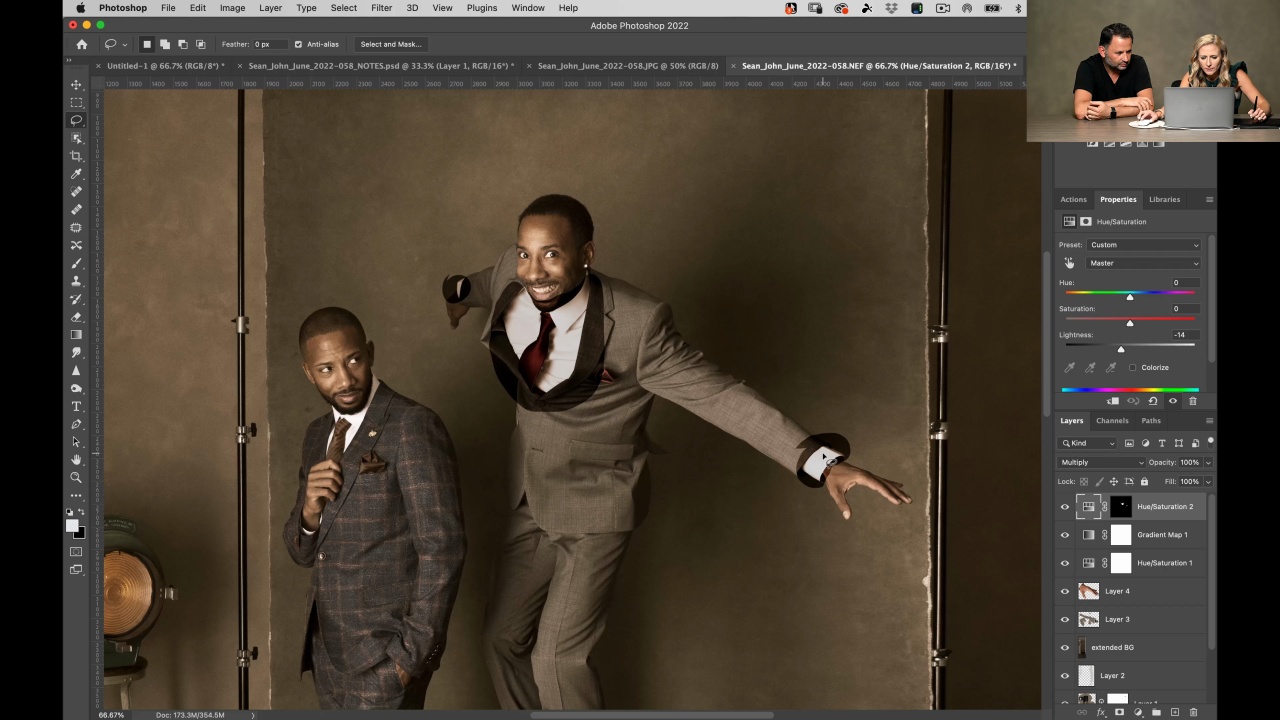
Color Treatment
In this lesson you learn how to give our professional tap dancer a full-color treatment resulting in a sepia-looking Action Portrait.
Jerry Review
In this lesson Jerry and Kristina review the image and do any final tweaks to craft this Action Portrait of Sean & John tap dancing.
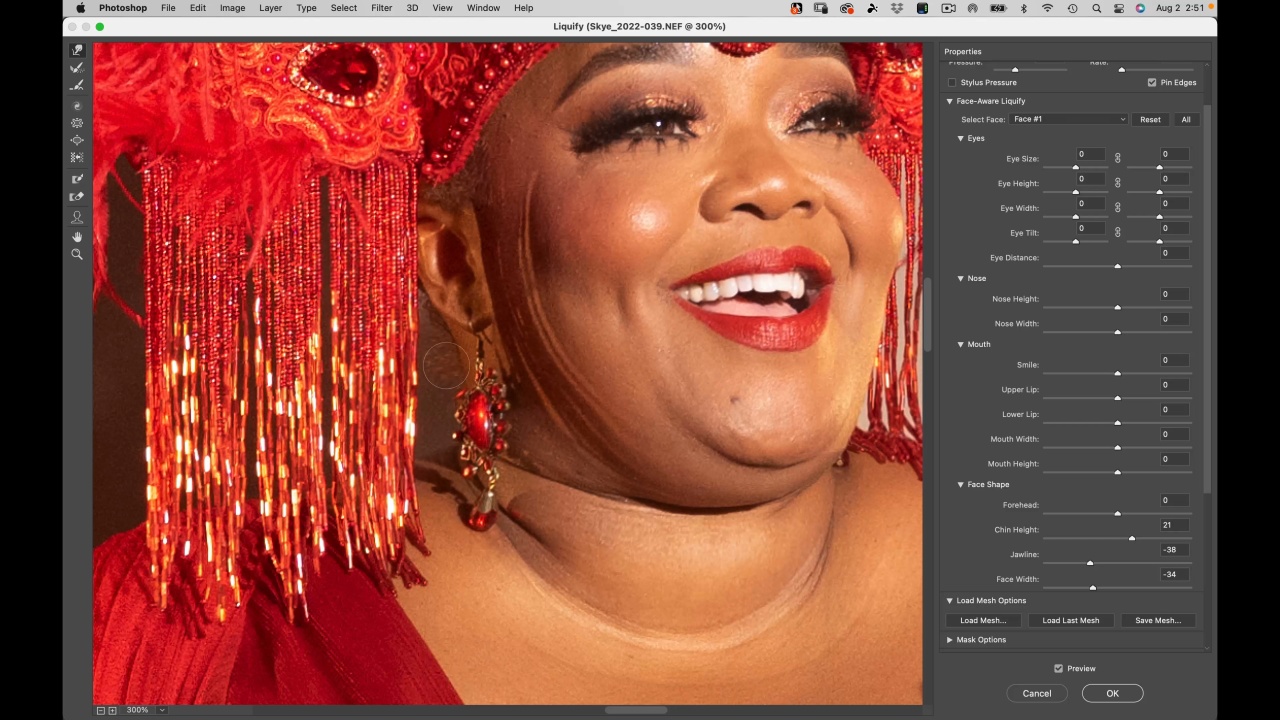
Skye on the Microphone
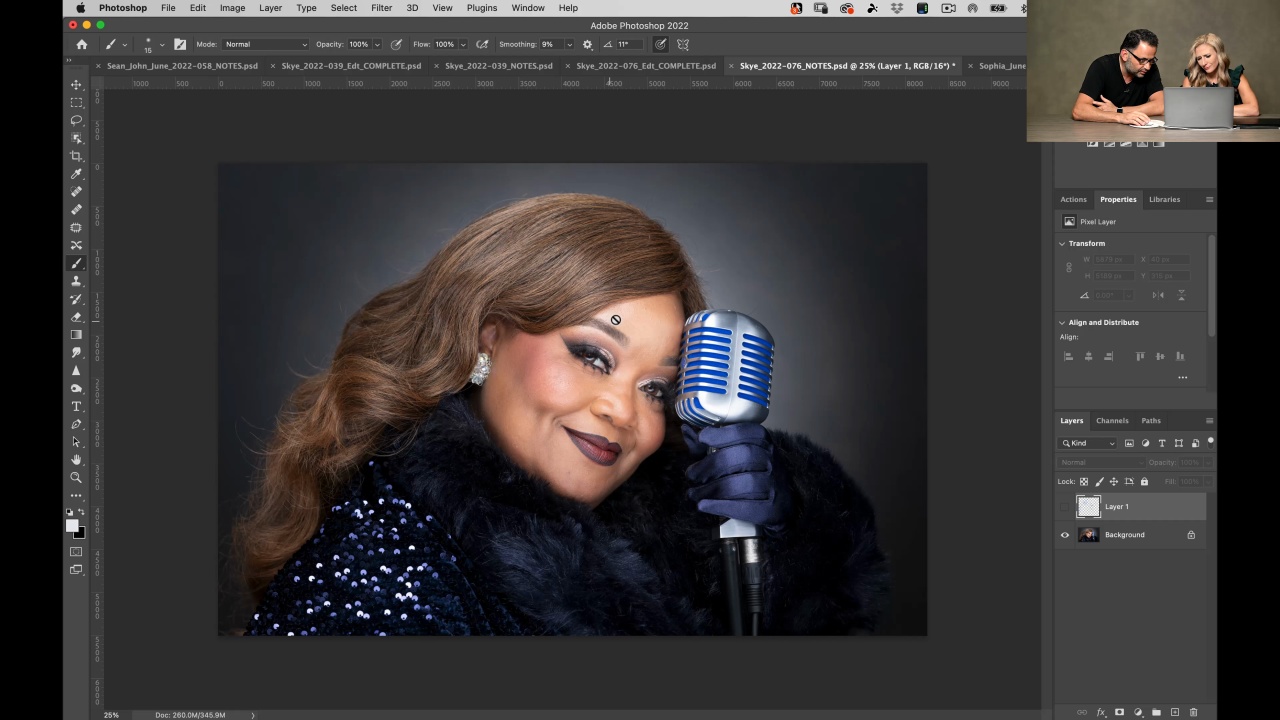
Introduction
In this lesson you learn what needs to be done to retouch this dazzling Portrait of Skye a famous sassy Jazz singer holding her mic.
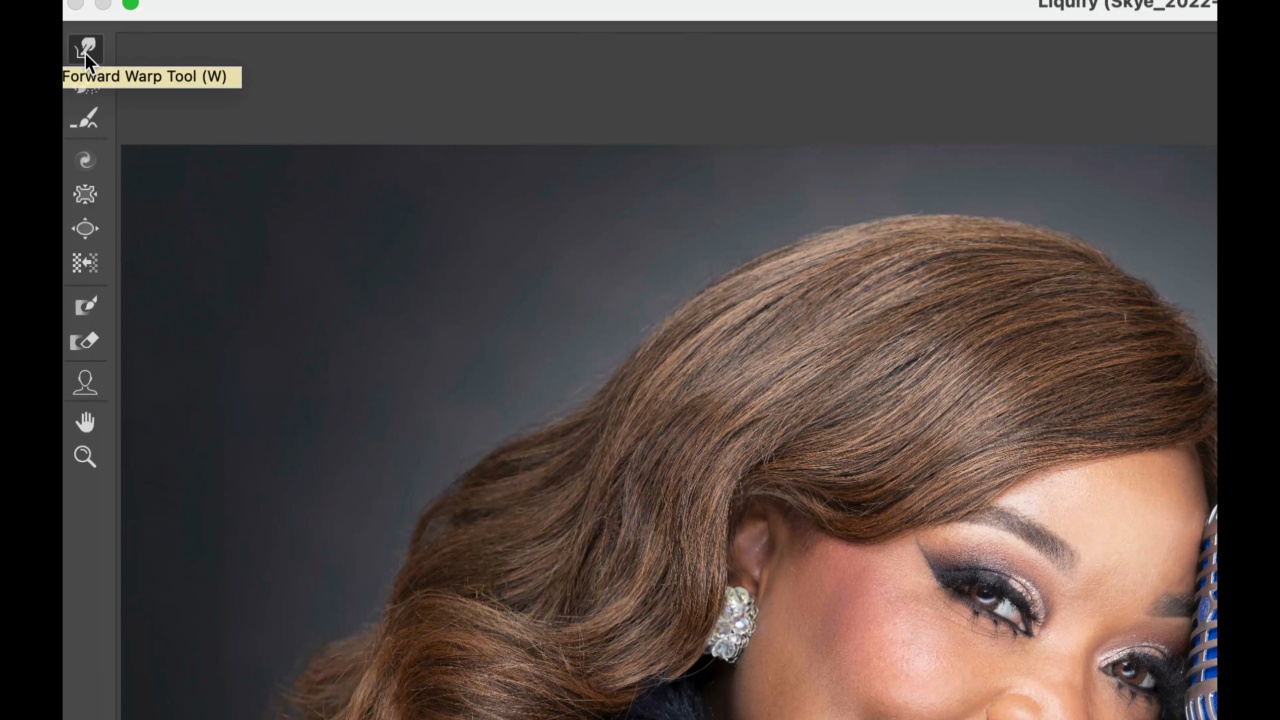
Hair Treatment
In this lesson you learn how to handle flyaway hairs using the healing brush as well as liquify tool. Then you learn how to use Face-Aware Liquify and an amazing AI-powered feature, letting you tig...
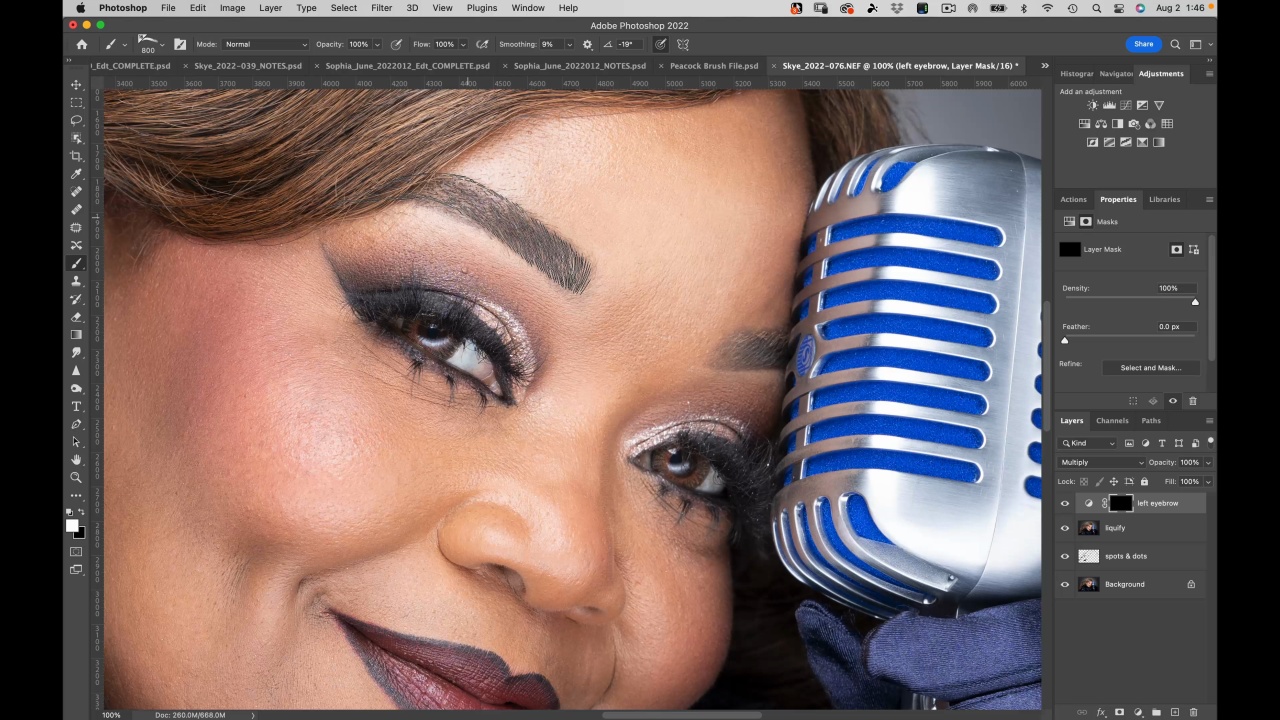
The Eyebrows
In this lesson you learn how to accentuate the eyebrows and really make the eyes pop. Included in this lesson, you will learn how to use the eyebrow brushes included with this course.
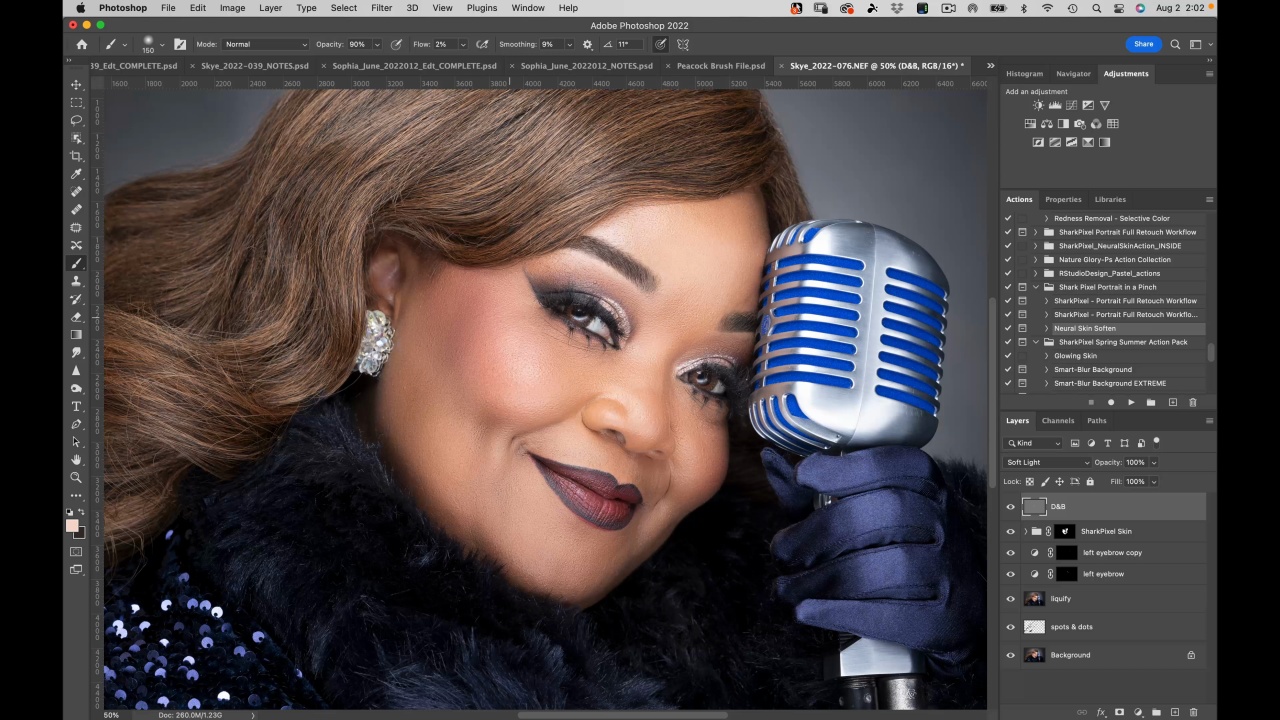
Dodge, Burn and Frequency Separation
In this lesson you learn what dodge and burn is and how to properly use them to add more dimension to the face and lips. Then you learn to use Frequency Separation to smoothen the skin further.
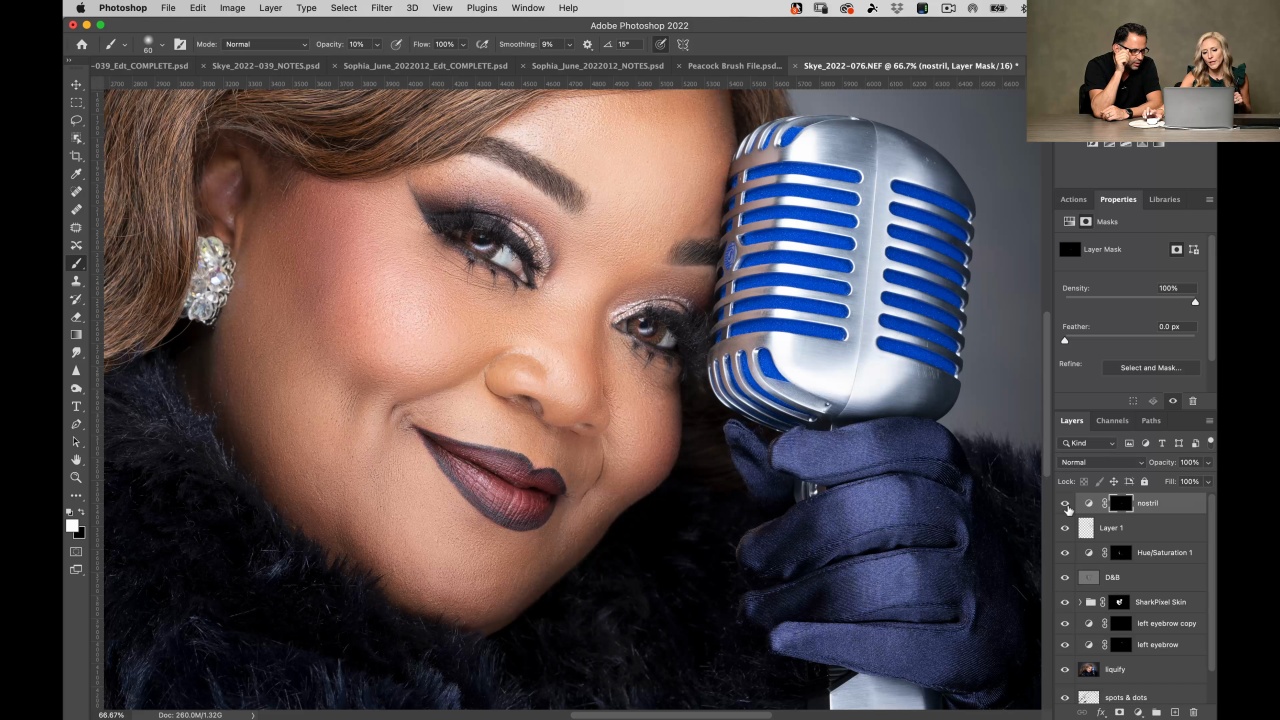
Jerry Review
In this lesson you learn how Jerry and Kristina work together to give this image its final tweaks to result in this Masterpiece bringing out the best in Skye's stage performance Portrait.
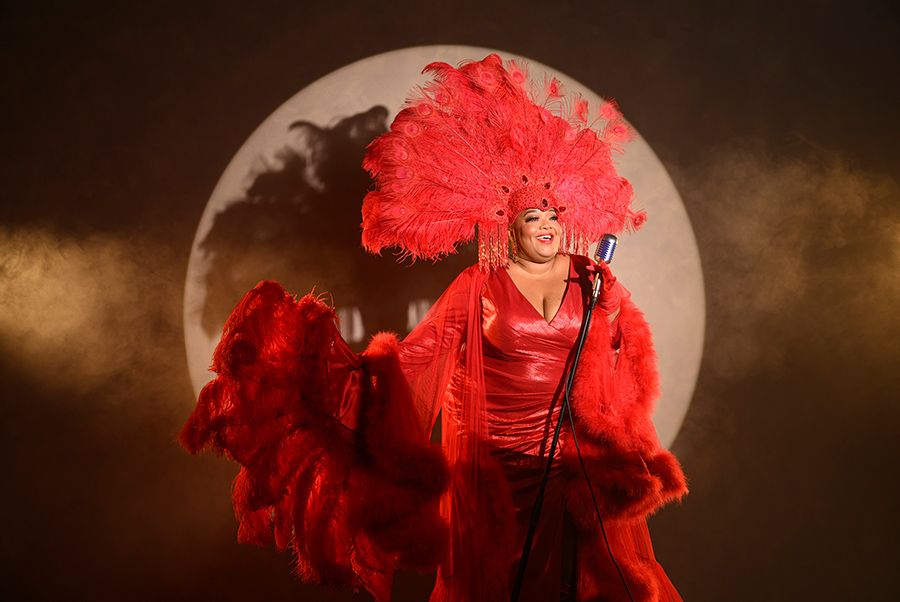
Skye in Red Dress on Stage
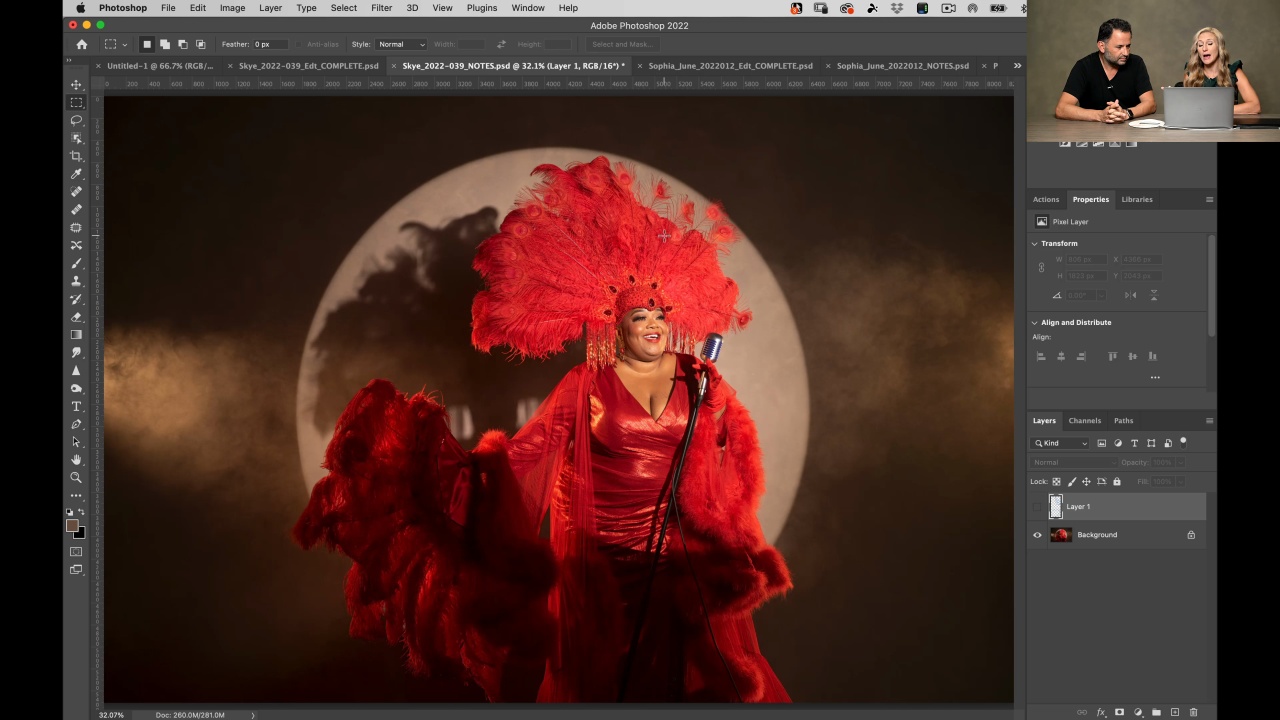
Introduction
In this lesson you learn how this photo of Skye in an eye-catching red Show Girl outfit gets retouched to make her look her best and ready for a billboard.
Liquify
In this lesson you learn how to use Liquify to give our singer a nip and tuck were requested as well as add missing volume to the dazzling headgear of the red-feathered showgirl outfit.
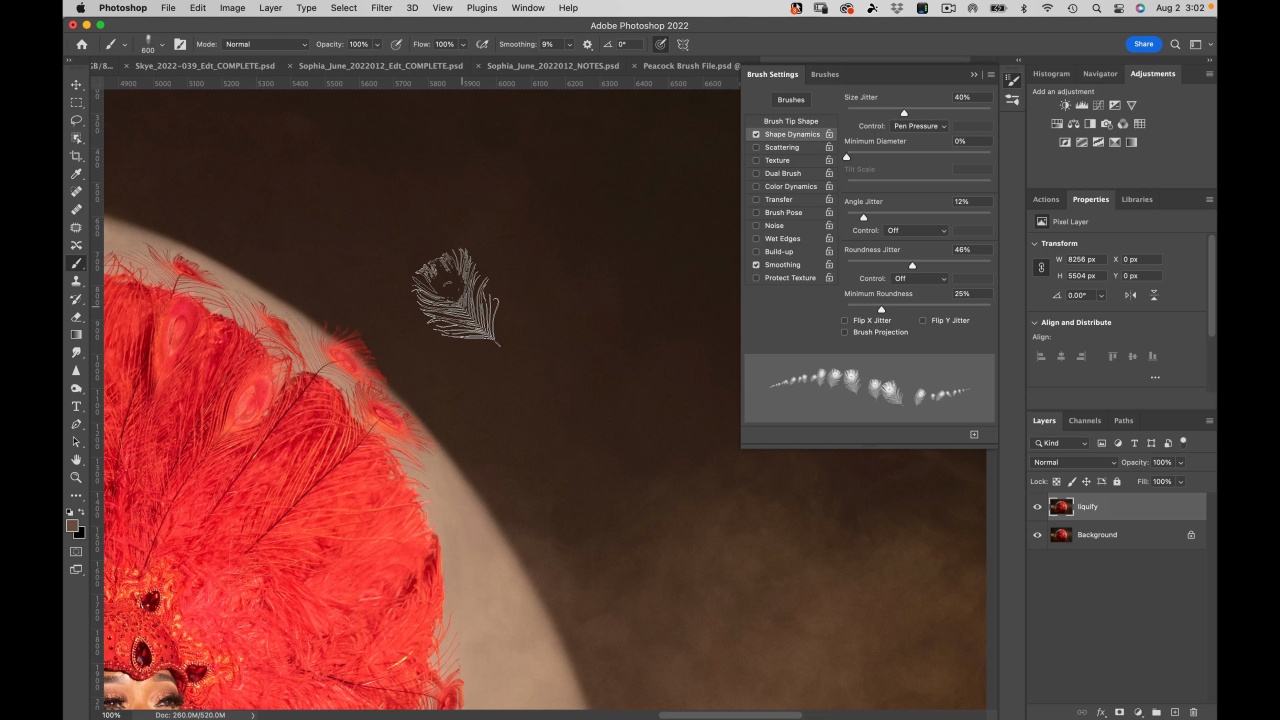
The Headpiece
In this lesson you learn how to add missing feathers to the headpiece to make it look flawless. As part of this, you learn how to create a brush and then brush in what is missing.
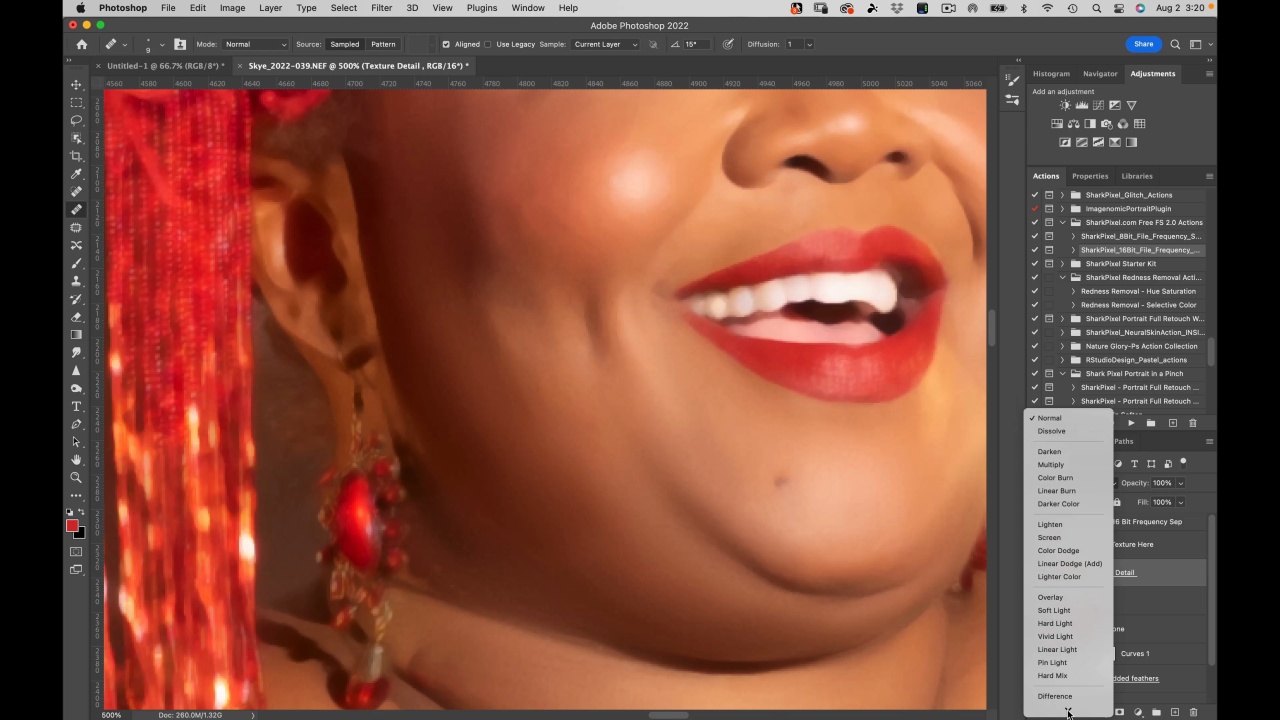
Skin Work
In this lesson you will learn how to retouch the Skyes skin using two different techniques, so it looks flawless and natural.
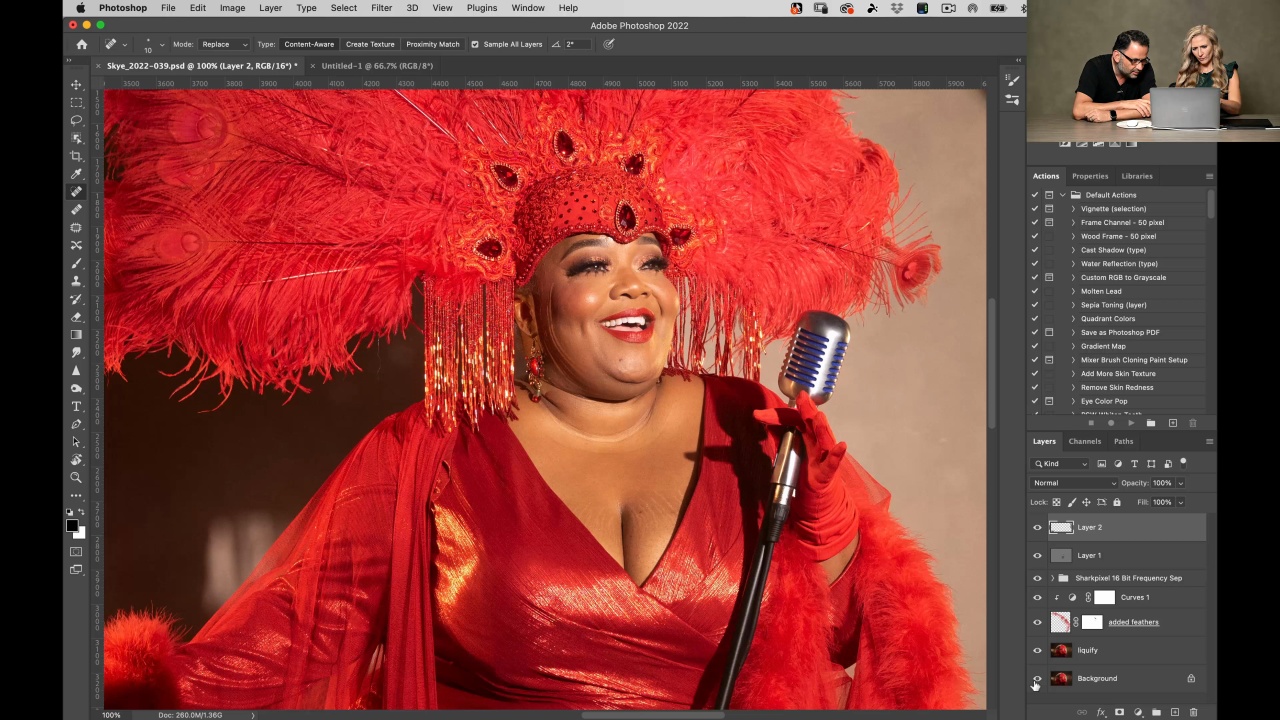
Jerry Review
In this lesson Jerry and Kristina review the final retouch and go over if anything needs to be adjusted to complete this Portrait so it can be featured on a billboard.
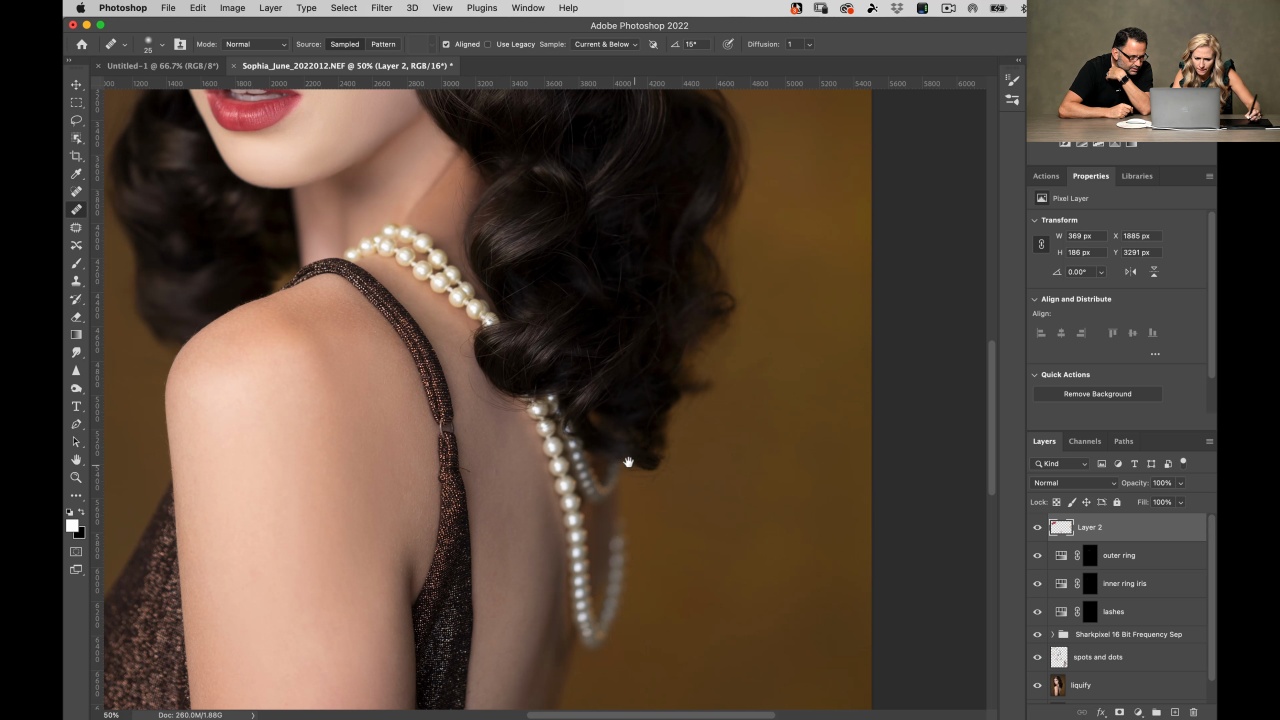
Sophia a la Vintage
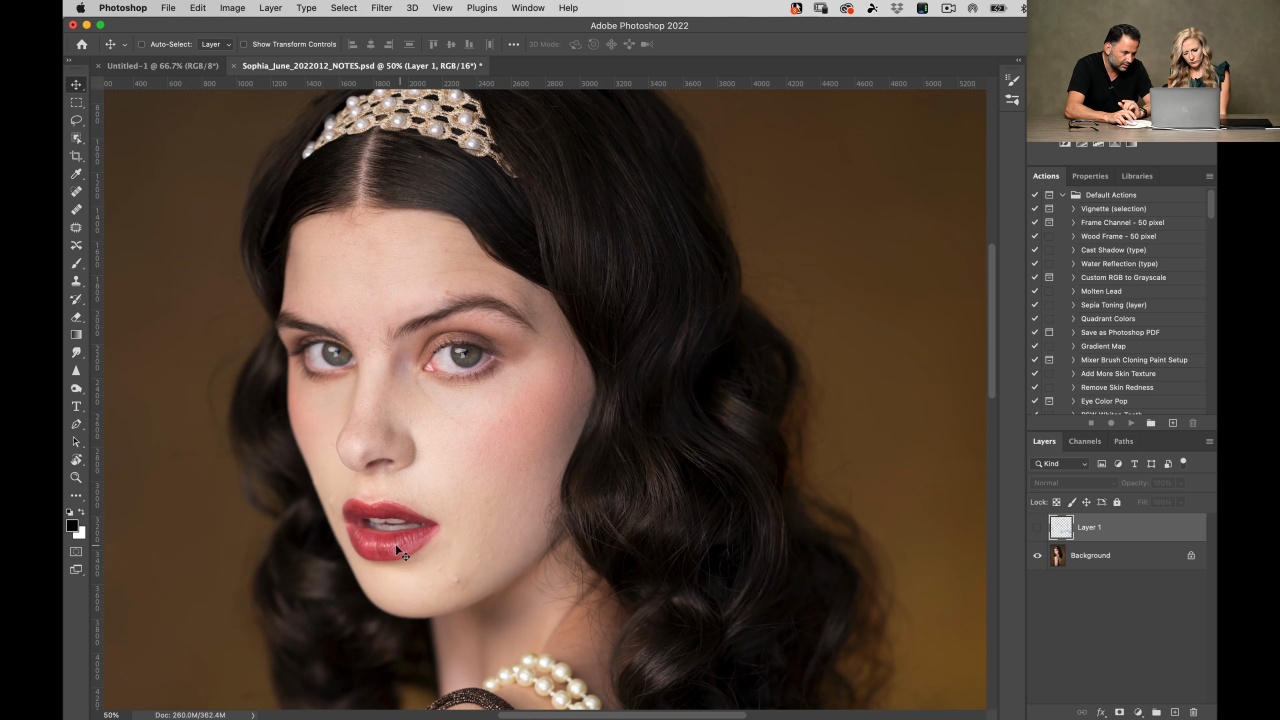
Introduction
In this lesson you learn how we plan on retouching Sophie’s Portrait to make her look her best in her Vintage regal dress.
The Hair
In this lesson you learn how to retouch Sophie’s hair so it feels nice and dramatic and giving her curls more form using several techniques. Then we adjust dots and spots and remove any imper...
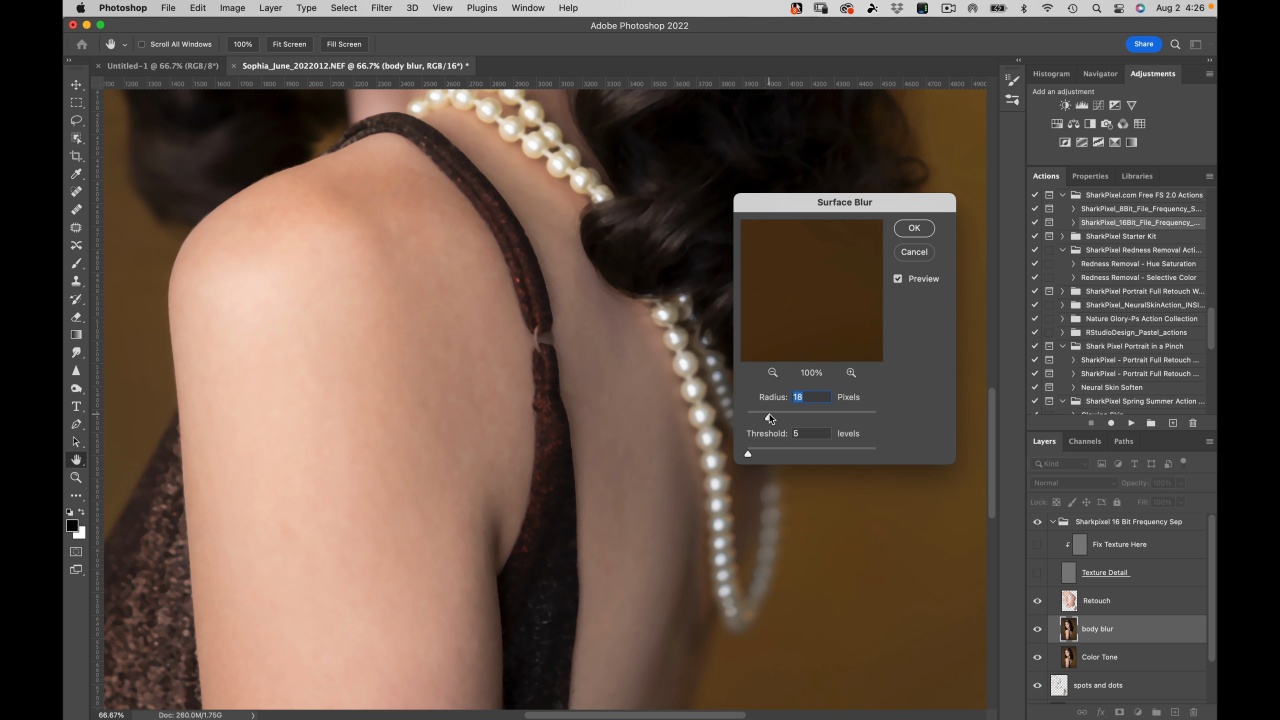
Frequency Separation
In this lesson you learn how to use frequency separation to make Sophia’s skin look stunning and flawless.
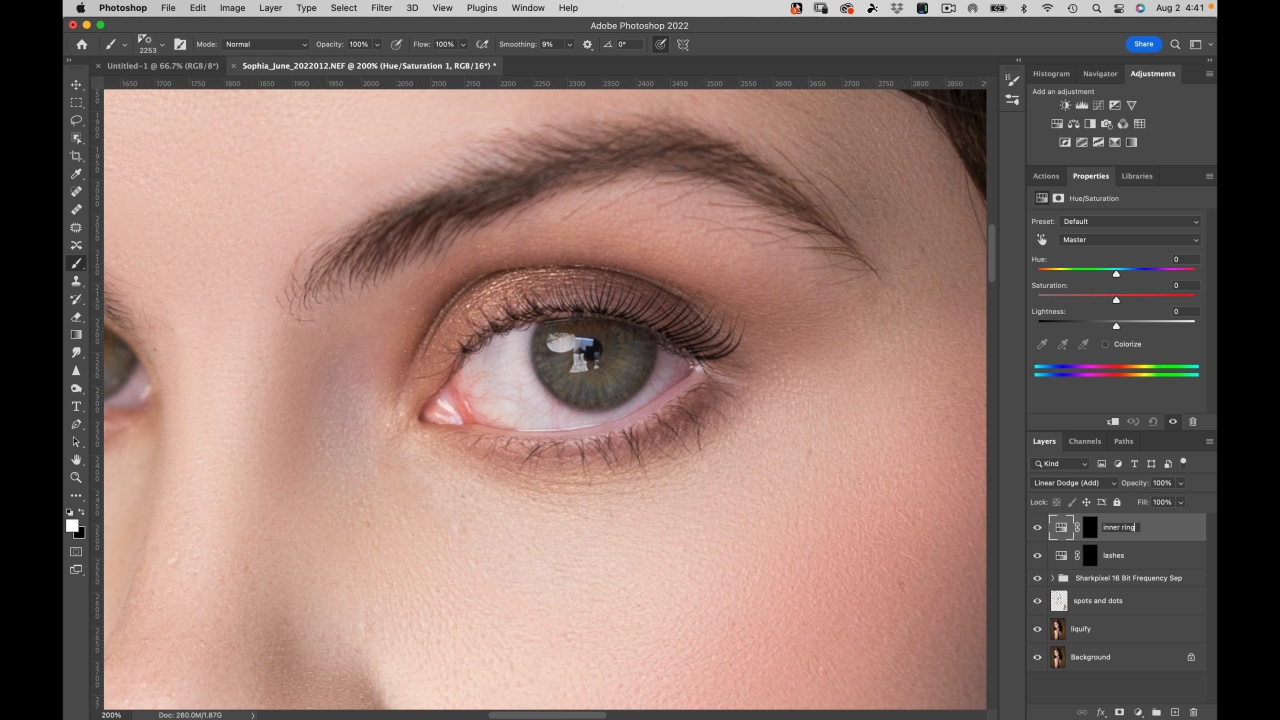
The Eyes
In this lesson you learn how to use custom brushes to really accentuate the eyes and make Sophie’s eyes stand out.
Jerry Review
In this lesson you see how Jerry and Kristina review the final Portrait of Sophie and what is needed to get it completed to give it this regal and majestic feel.
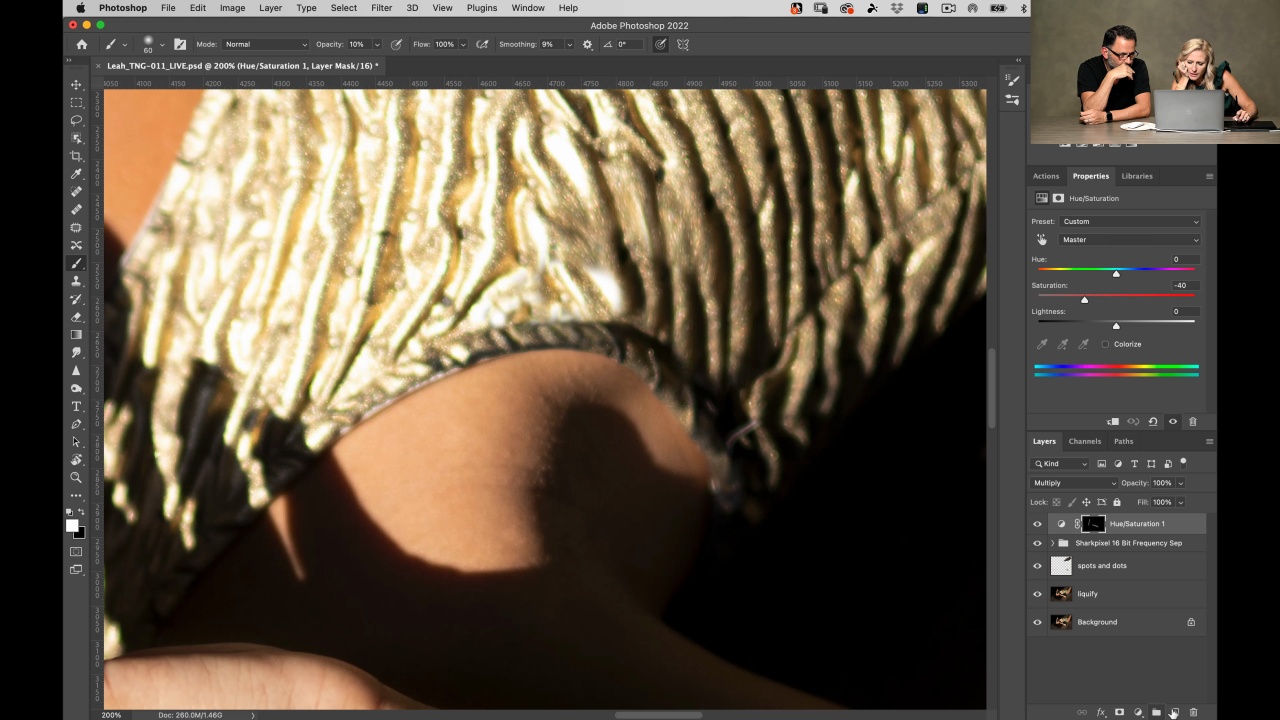
Leah in Bodysuit
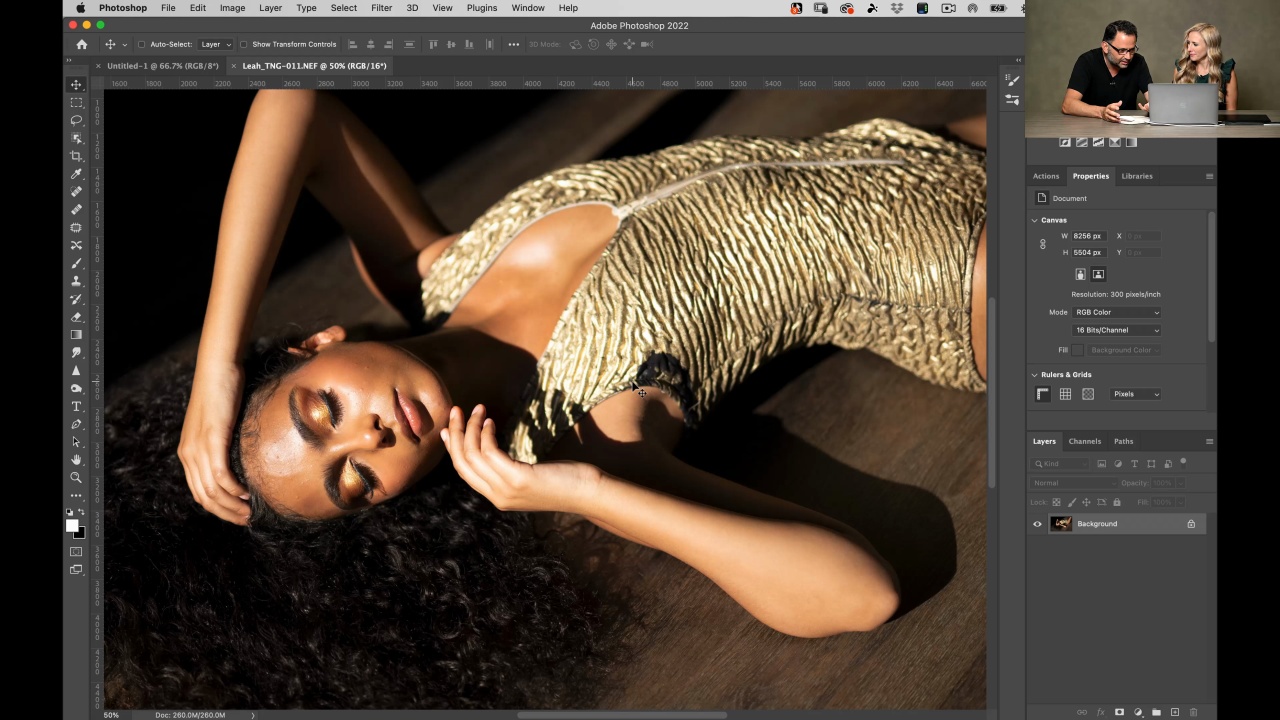
Introduction
In this lesson Jerry goes over with Kristina on what is needed to retouch this sensual Portrait of Leah in a bodysuit.
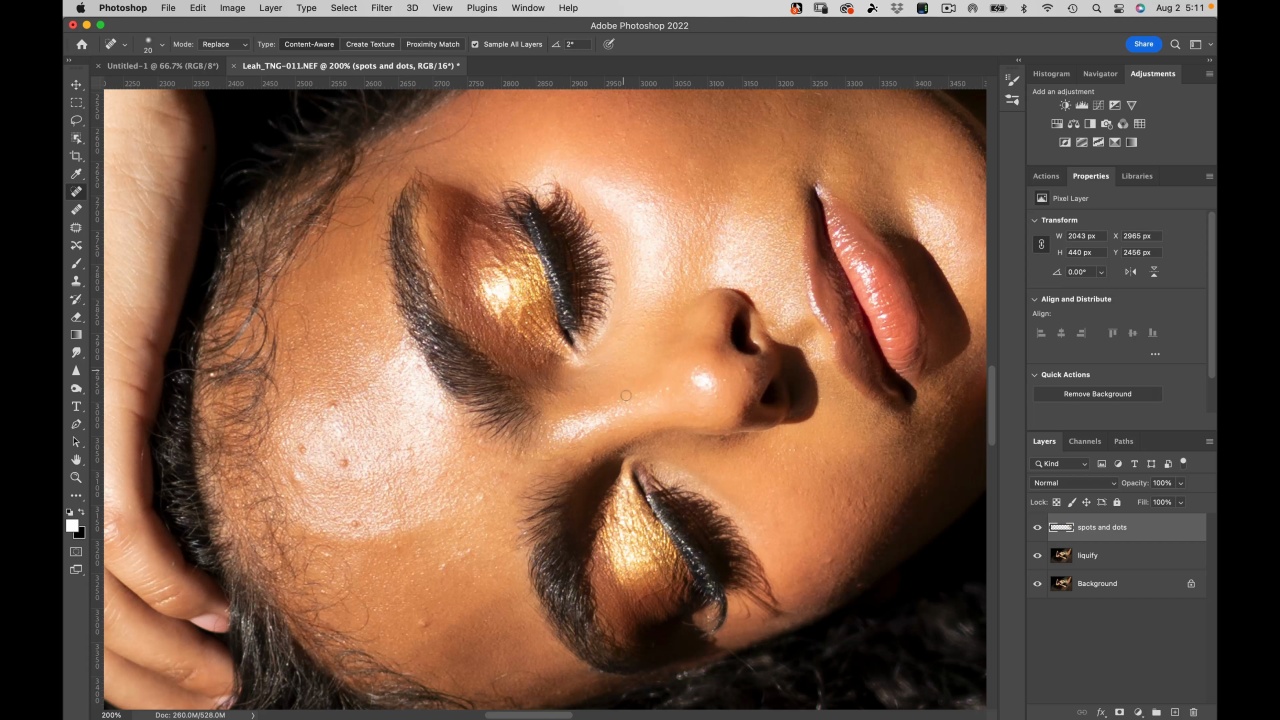
Edit
In this lesson, you learn how to remove a colored spot on the bodysuit, then how to remove spots and dots, and last but not least, how to remove a distracting shadow from the floor.
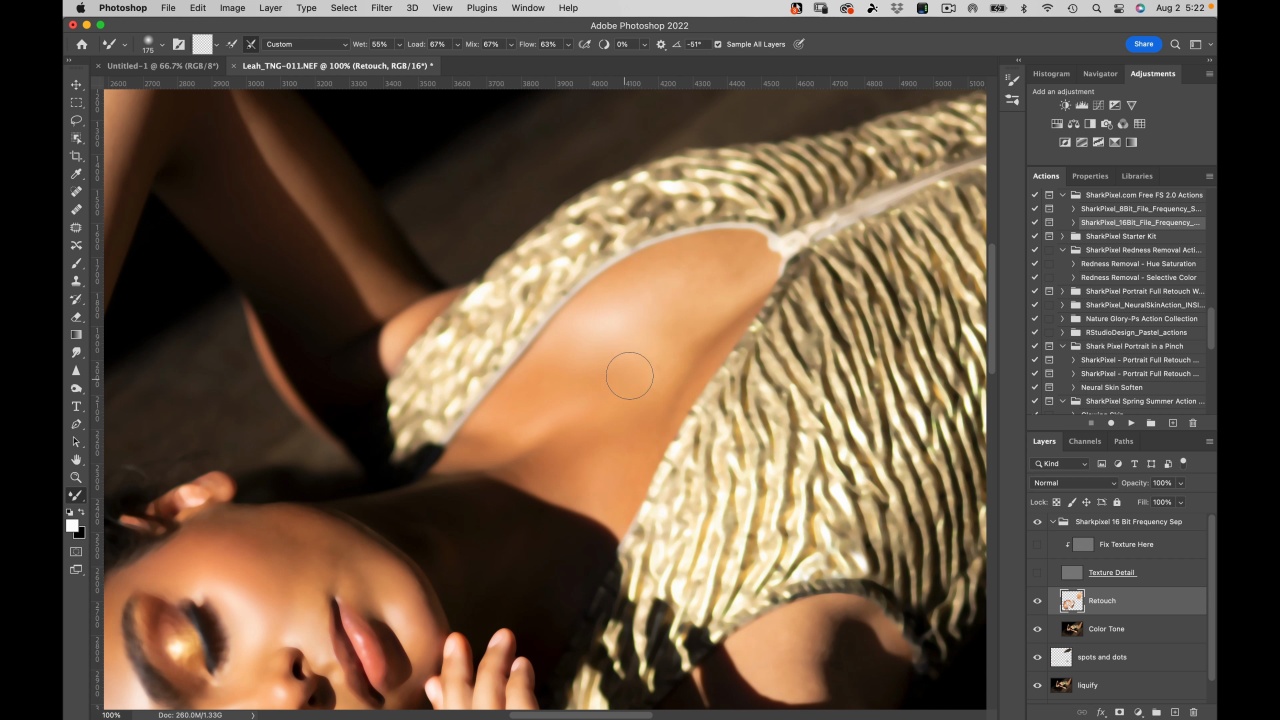
Frequency Separation
In this lesson you learn how to do frequency separation to remove stretch marks on the skin as well as give Leah’s skin a beautiful finish by blending colors together.
Jerry Review
In this lesson Jerry and Kristina review Leah’s retouched Portrait and give it the finishing touches to result in this gorgeous-looking Portrait.
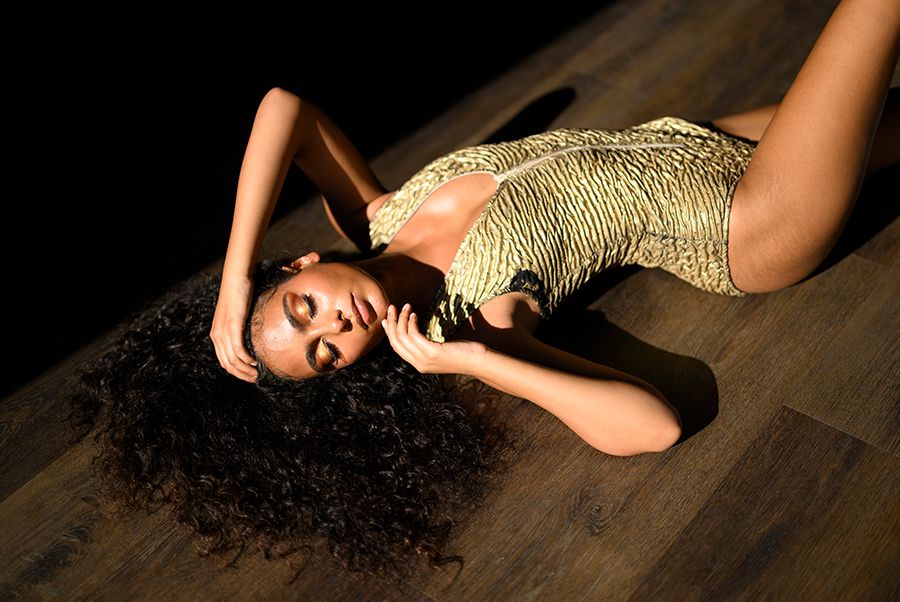
Mariah Close up

Introduction
In this lesson Jerry and Kristina go over this close-up and introduce a notes layer to keep track of all the required changes to make this riveting Portrait of Mariah become print ready.
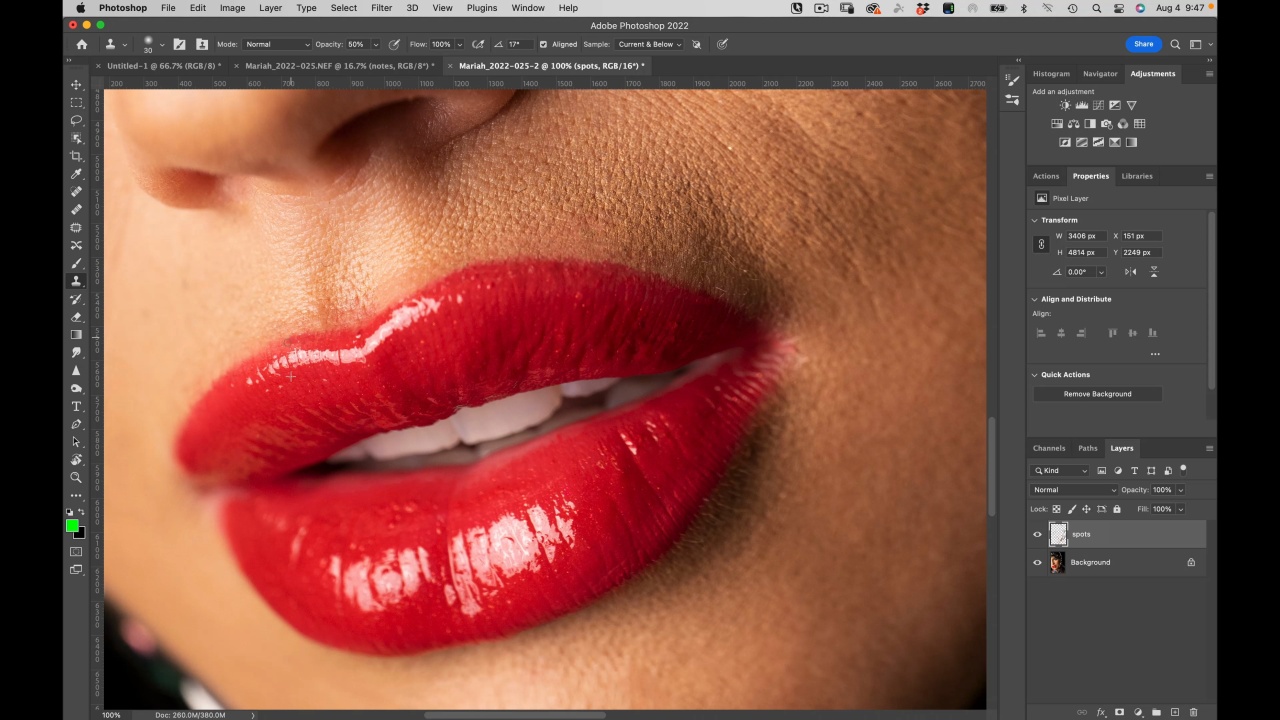
Spots and Dots
In this lesson you learn how to remove tiny spots and dots on Mariah’s face and around her lips, eyebrows, and skin.
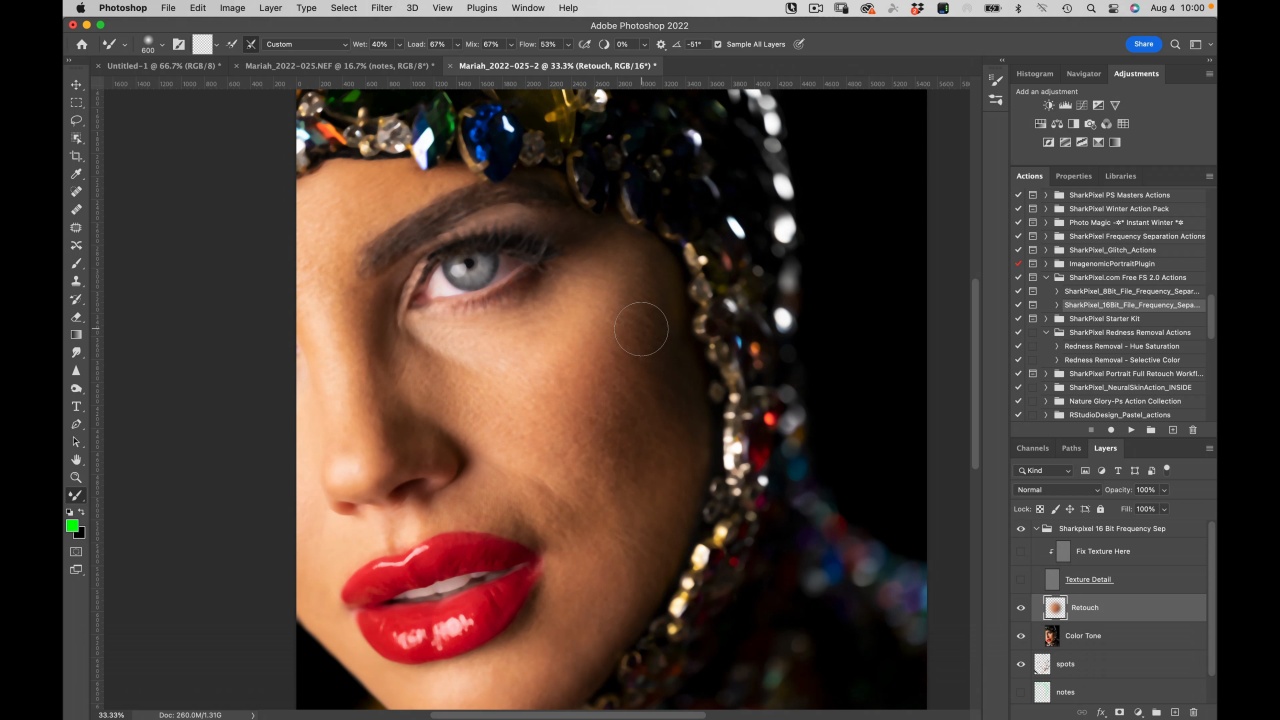
Frequency Separation
In this lesson you learn how to use frequency separation to enhance the skin on a Portrait that will be enlarged and printed.
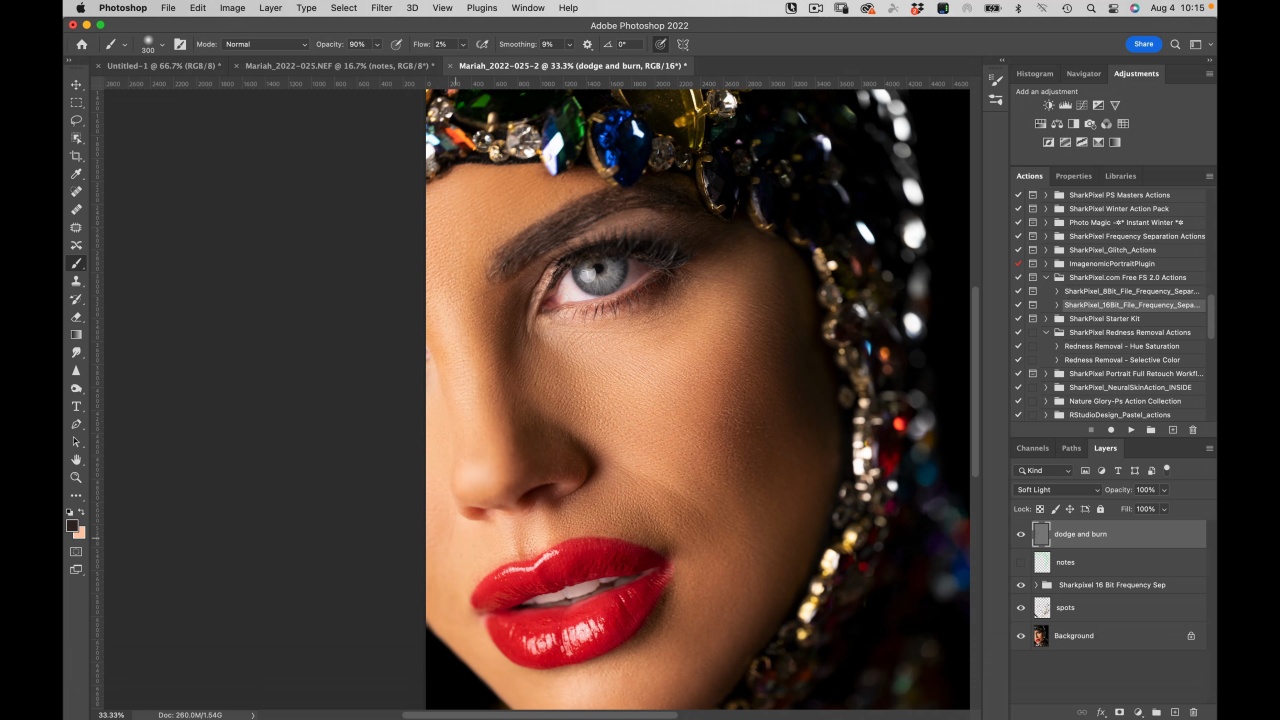
Skin
In this lesson you learn how to dodge and burn to give Mariah's Portrait more dimension and beauty by darkening certain spots and brightening others.

The Gemstones
In this lesson you will learn how to colorize specific gems in Mariah’s headpiece - making it look dazzling and interesting.

Jerry Review
In this lesson Jerry and Kristina review Mariah’s retouched Portrait and give it the last tweaks to result in this bedazzling Close up Portrait of Mariah ready to print.
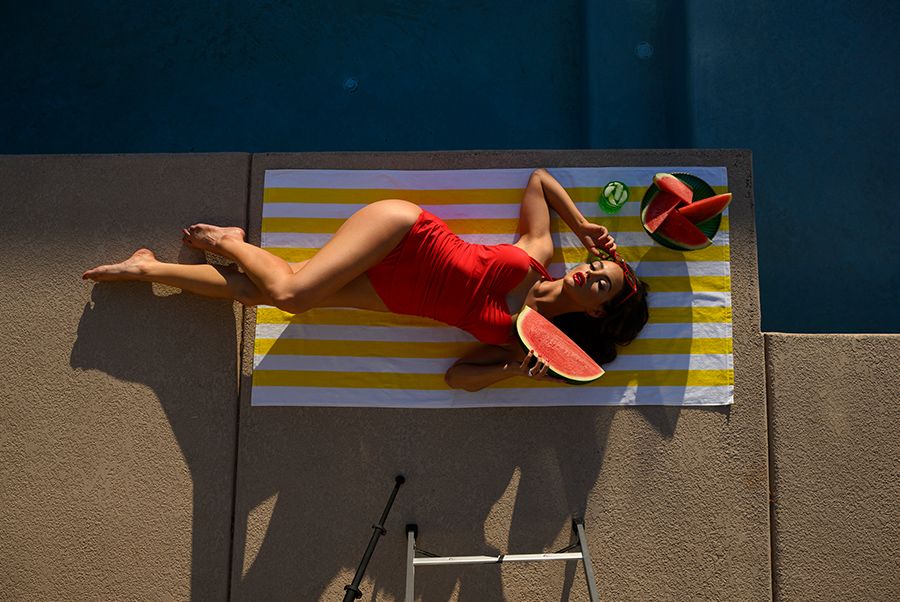
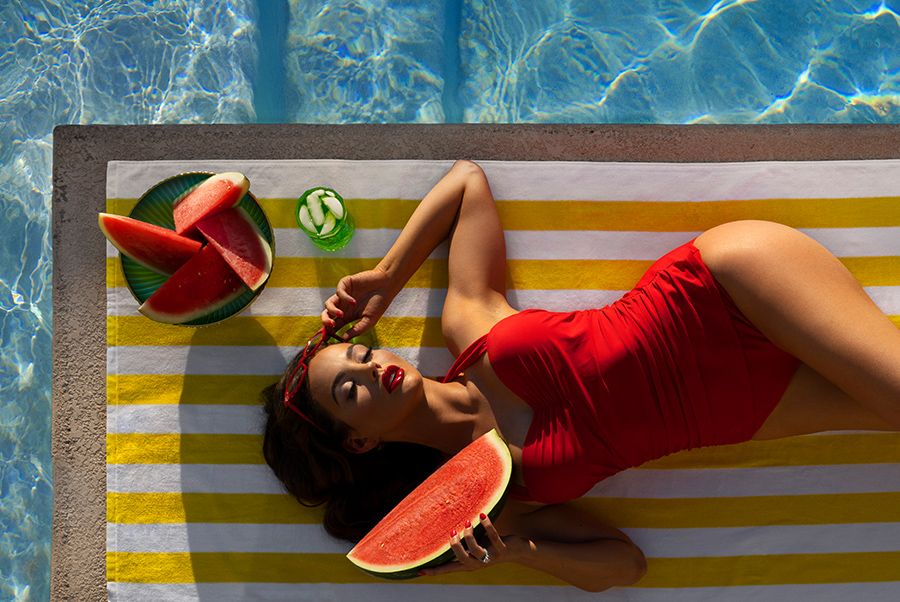
Mariah in Swimsuit at the Pool
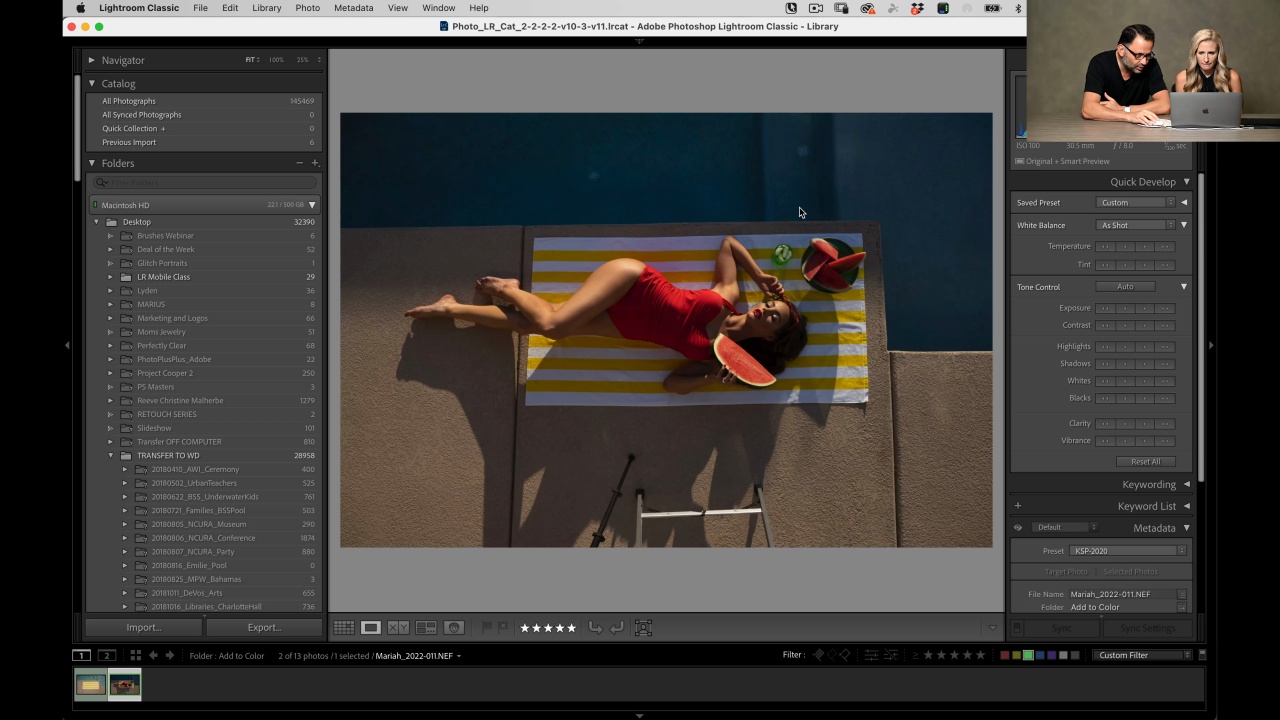
Introduction
In this lesson Jerry goes over with Kristina what is needed and the challenges he encountered that we now need to make up for in Photoshop.
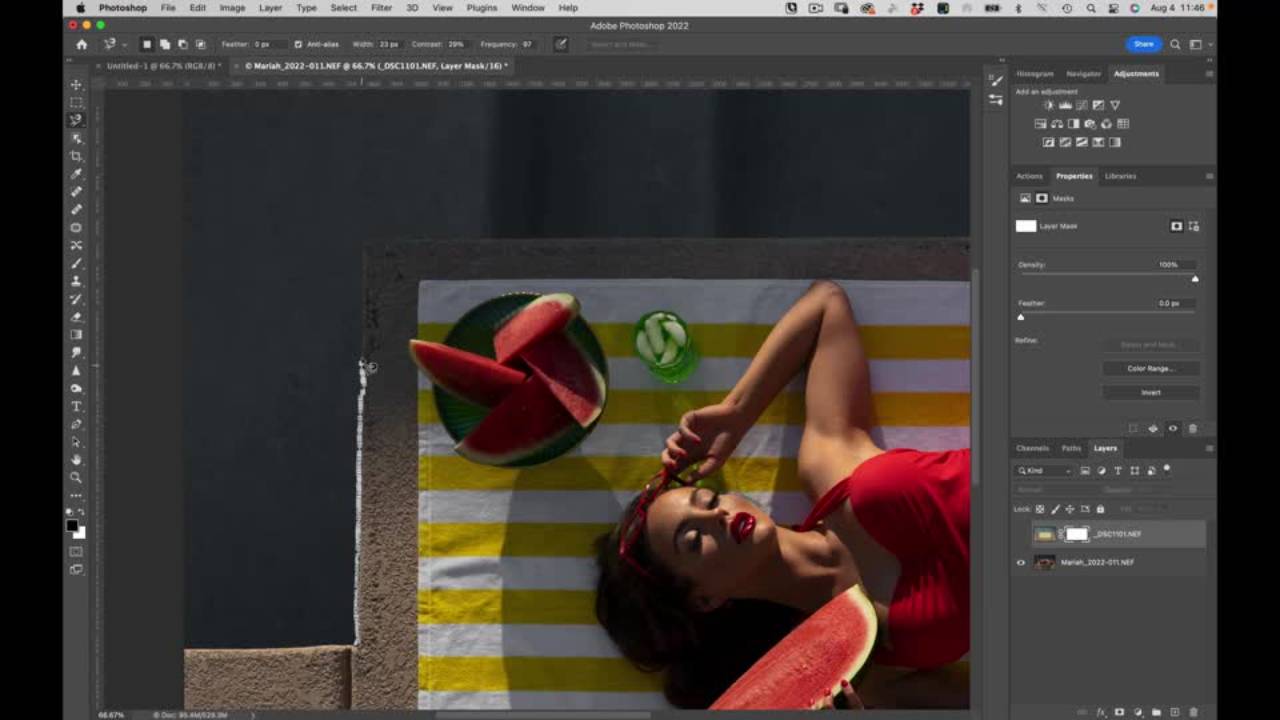
Putting it Together
In this lesson you learn first to straighten the images out using the transform function of Lightroom and then how to blend them seamlessly together in Photoshop.
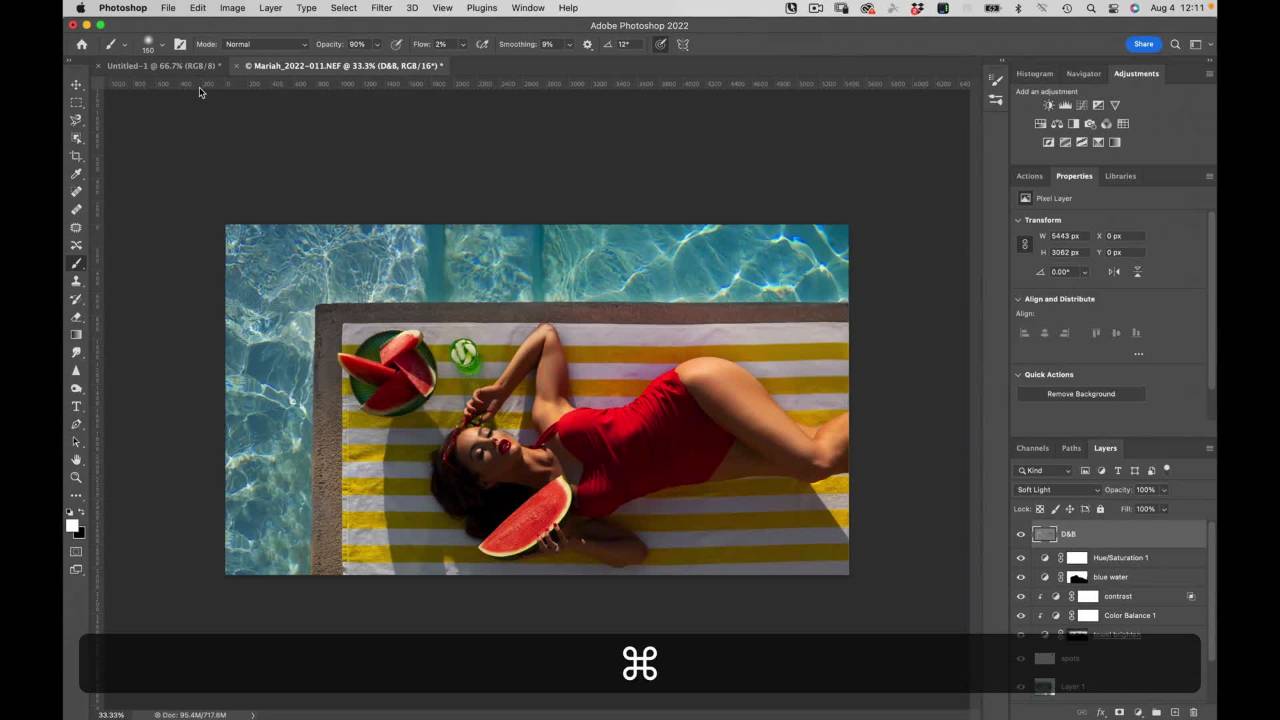
The Pool Water
In this lesson you learn how to change the color of the pool water to make it look tantalizing and ready to take a swim, then you learn to saturate the color overall and remove any skin imperfections.
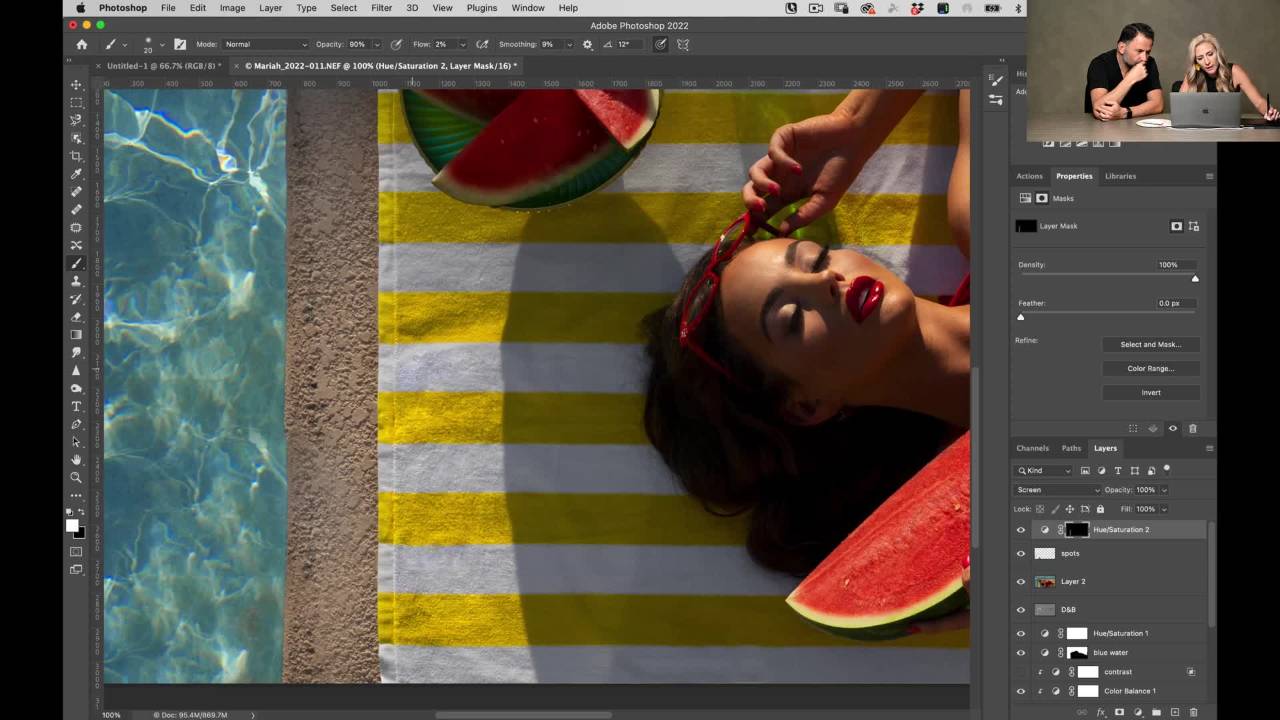
Jerry Review
In this lesson Jerry and Kristina review the Portrait of Mariah lying next to the pool and do any last tweaks to the concrete, towel, and Mariah to result in this alluring and sunny swimsuit Portra...
Imagine you could…
- Elevate every portrait you touch, leaving your subjects in awe of the result.
- Approach retouching with confidence and speed, freeing you to focus on your artistic vision.
- Create stunning images that surprise and delight your friends, family, and models.

Today's Special Deal Offer!
Act now! This special offer is ending soon...

New Release
The Portrait Retouching Masterclass
$97$47
Ever been captivated by a perfect portrait and wondered how to recreate the magic? It's time to unlock the secrets of professional retouching. Learn to transform your photographs into stunning, gallery-worthy masterpieces, all on your own.
GET STARTED"Mastering portrait retouching can seem daunting, but with the right guidance, it's absolutely within your reach. In this course, I've poured all the techniques and secrets that I've honed over years of professional retouching. From removing small imperfections to creating flawless skin, this masterclass is your key to creating portraits that don't just capture a person's likeness, but their spirit. Transform your portraits from simple photos into masterpieces that stand the test of time."
Kristina Sherk
Lessons
72
Length
11h 35m

Access
Phone / Tablet / Desktop
Frequently Asked Questions
You can watch the course online through your browser across all your devices. Just, login on the site from your computer, phone, or tablet.
The self-paced online course is available now. You decide when you start and finish.
Lifetime access! After enrolling, you have unlimited access to this course for as long as you like.
We think you will love this course. However, you have our 100% money-back return policy guarantee within the first 30 days after purchase. If you are unsatisfied with the course, for any reason, email us and we will give you a full refund. No Questions Asked.
With purchase includes free technical support. Email us and our knowledgeable team members will help you as best they can.
Yes, you can purchase it as a gift. First, purchase under your email address using a credit card or PayPal. Lastly, Email customer service to transfer your purchase to the gift recipient's email.
Watch all the lesson videos with an internet browser. Just, login to the site from your computer, phone, or tablet.
YES, I WANT TO BUY NOW!
Act now! This special offer is ending soon...

New Release
The Portrait Retouching Masterclass
$97$47
Ever been captivated by a perfect portrait and wondered how to recreate the magic? It's time to unlock the secrets of professional retouching. Learn to transform your photographs into stunning, gallery-worthy masterpieces, all on your own.
GET STARTED